
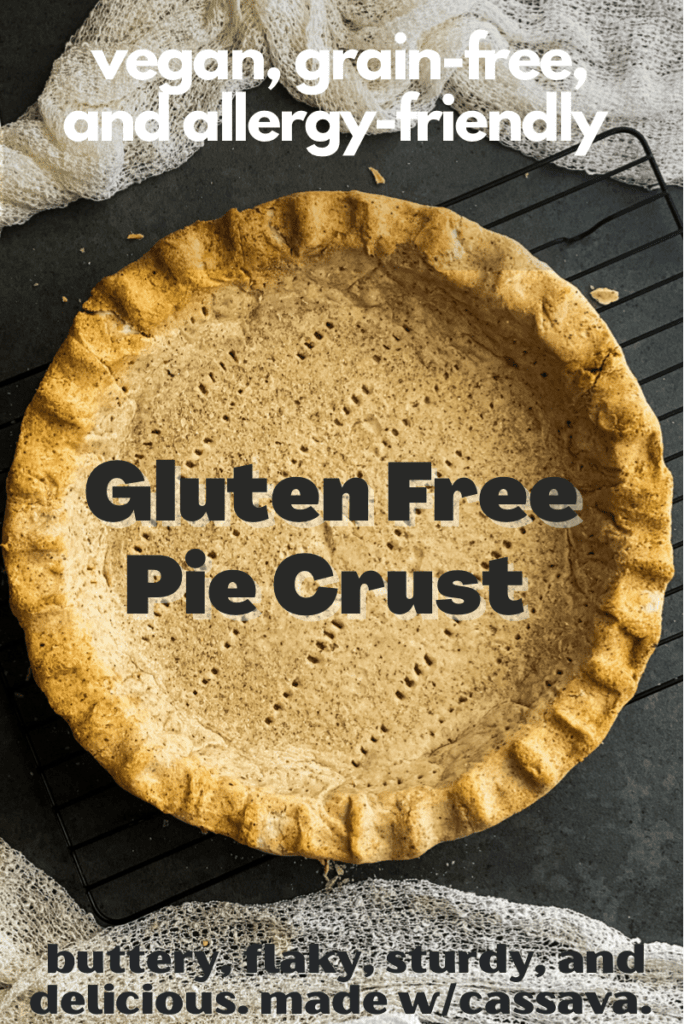
This gluten free pie crust is easy with a buttery taste and flaky texture. It’s sturdy and delicious, made with cassava. Vegan and grain free.
I went on a quest to make a pretty gluten free pie crust that was also simple to make with easy to find ingredients and no flour mixes.
In my years as a recipe creator, I’ve noticed that my international audience usually has problems getting the same gluten free flour mixes that I love and use in my home. So this recipe is whittled down to just a few common ingredients that hopefully everyone can find!
The ingredients for this gluten free pie crust:
Like I said, the ingredients here are pretty simple. I can find all of them at my local grocery stores, so I hope that you can too!
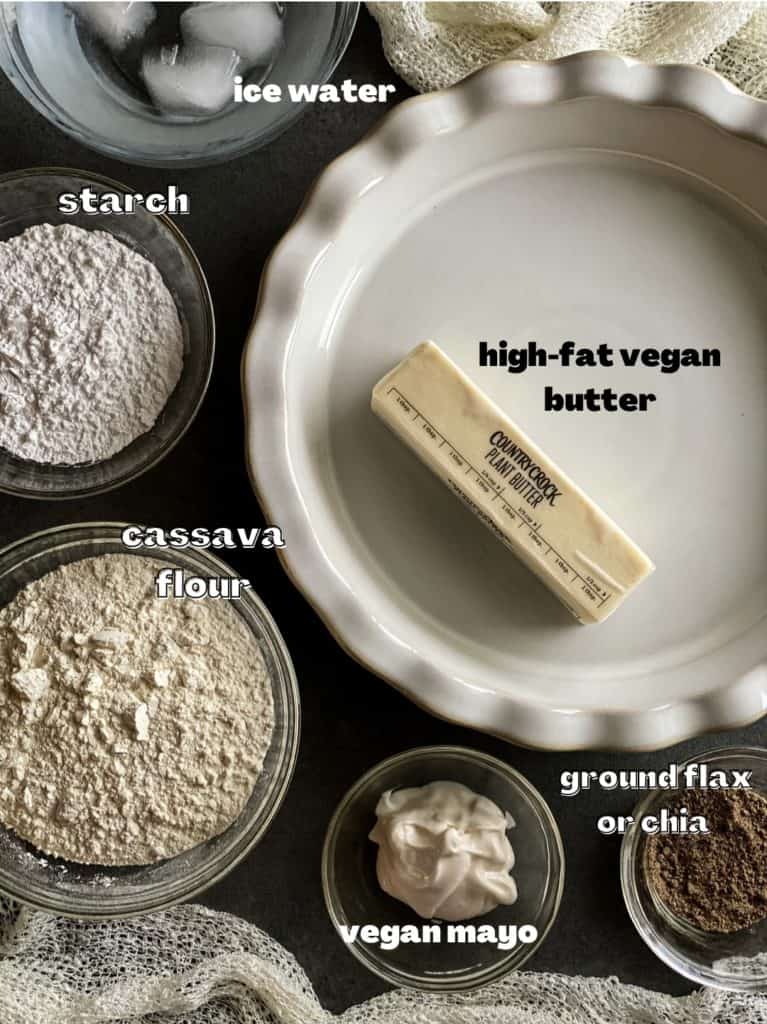
- The first ingredient in our gluten free pie crust is a high fat vegan butter. I love Country Crock plant butter sticks (all three varieties!) You could also use Miyoko’s, Earth Balance, Natruli, or Nuttlex. Whatever your go-to is. If you can’t or don’t want to use butter, palm oil or coconut oil will work here, too!
- Next, our main player for the flour mix is cassava flour. Yup! I finally did it. I found out what all the hype was about and it was justified. This stuff is amazing, tastes great, and plays pretty similar to wheat flour! Cassava is actually made from the tapioca, or yuca (not yucca), root, so it’s not a grain or a seed at all, but a tuber.
- For some lightness, we are adding starch. I used arrowroot starch, but you could use tapioca if you’d like. You can also use corn or potato starch if you’re not opposed to it, but reduce the amount by half if you do.
- For binding power, we have ground flax seed! I use flax in a lot of my baking as an egg replacer, and usually I soak it in some water or aquafaba first (to make a “flax egg”), but we don’t need to soak this first. If you don’t have or don’t want to use flax, you can also use ground chia seeds.
- Ice water is important to keep everything nice and chilly for as long as we can, making the dough easier to handle and giving us a more crisp end result.
- Lastly (yes, I saved it for last because I know people will freak out), is mayonnaise. Yup. Mayo. You probably know I love mayonnaise, but I swear it’s for a reason and it serves a purpose!! The mayo has some binding capabilities, adds a lot of richness, and the vinegar helps to keep the dough from oxidizing. Be aware that Hellmann’s vegan mayo uses corn starch, so if you’re avoiding that I would go with Sir Kensington’s.
Equipment for the gluten free pie crust:
Nothing too complicated here, folks.
- You’ll need a pie plate. This recipe will cover one 9″ pie plate.
- A food processor or pastry cutter/blender.
- You will also need a rolling pin and two sheets of larger-than-pie-plate-sized parchment paper to roll out the crust.
- You need a freezer to chill your fats before mixing and your crust before baking.
- You need a fork, skewer, knife, or other pointy implement to pierce the crust so steam doesn’t accumulate under it during baking.
- You’ll need some dry beans or pie stones to weigh the crust down while blind baking (pre-baking the crust before you fill it) if you decide to go that route.
- You need an oven to bake the crust in.
- A cooling rack to rest the fresh-out-of-the-oven pie plate on.
Bringing it all together: making the pie crust
Please see the recipe card at the bottom of the post for exact measurements and a printable recipe for easy use.
- Get your ingredients and equipment together before you start. Since the dough is temperature sensitive, you want to make sure you have it all at the ready.
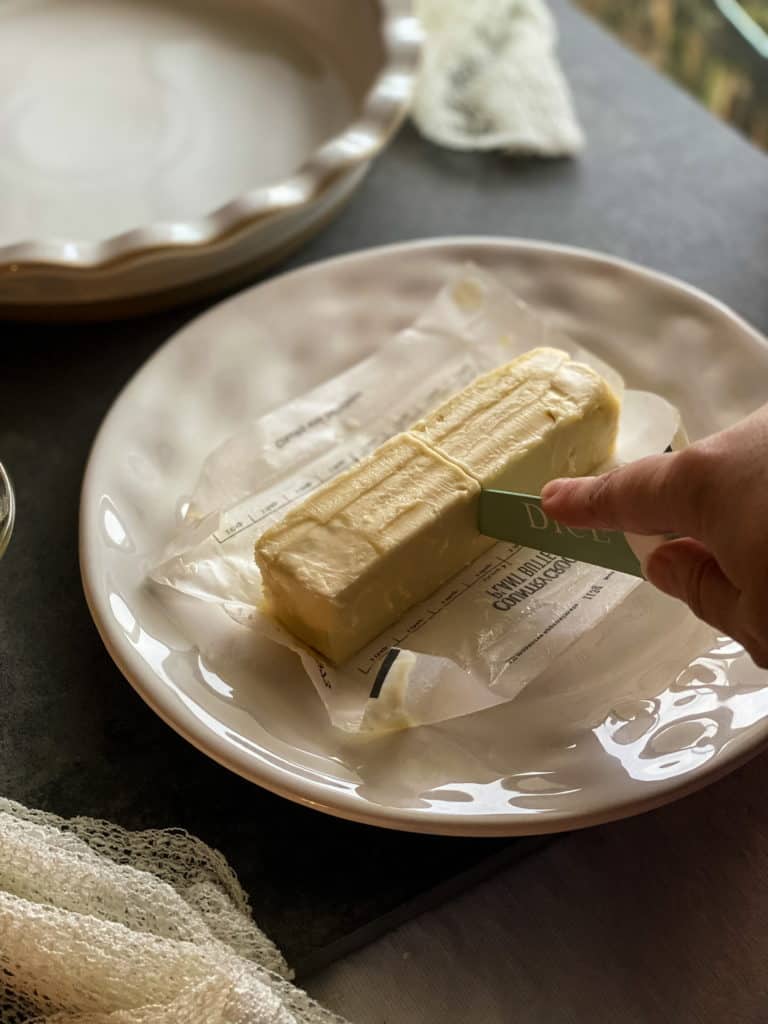
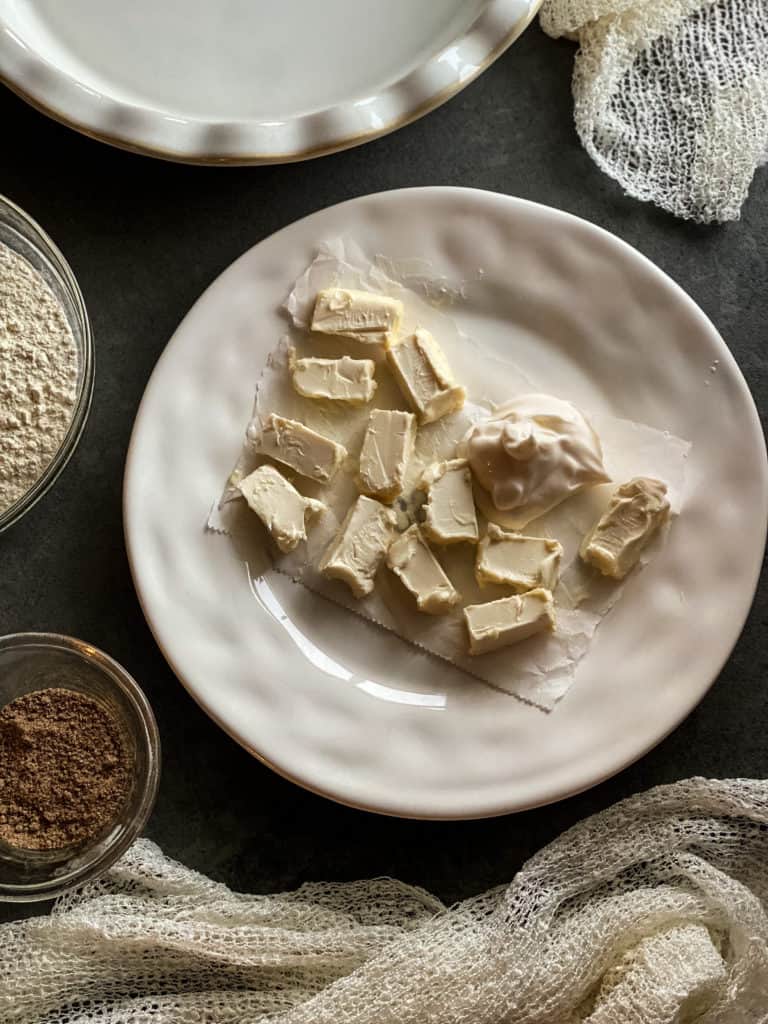
- We only need a half a stick of butter (1/4c, or 55g), so go ahead and remove half. Save it for buttering the pie plate later.
- Slice the butter into tiny cubes. I got 12 tiny cubes out of mine – or I guess rectangular prisms, but whatever. The smaller the better but don’t get frustrated over it. Put the cubed butter in a single layer along with the mayo on some parchment paper and pop it in the freezer.
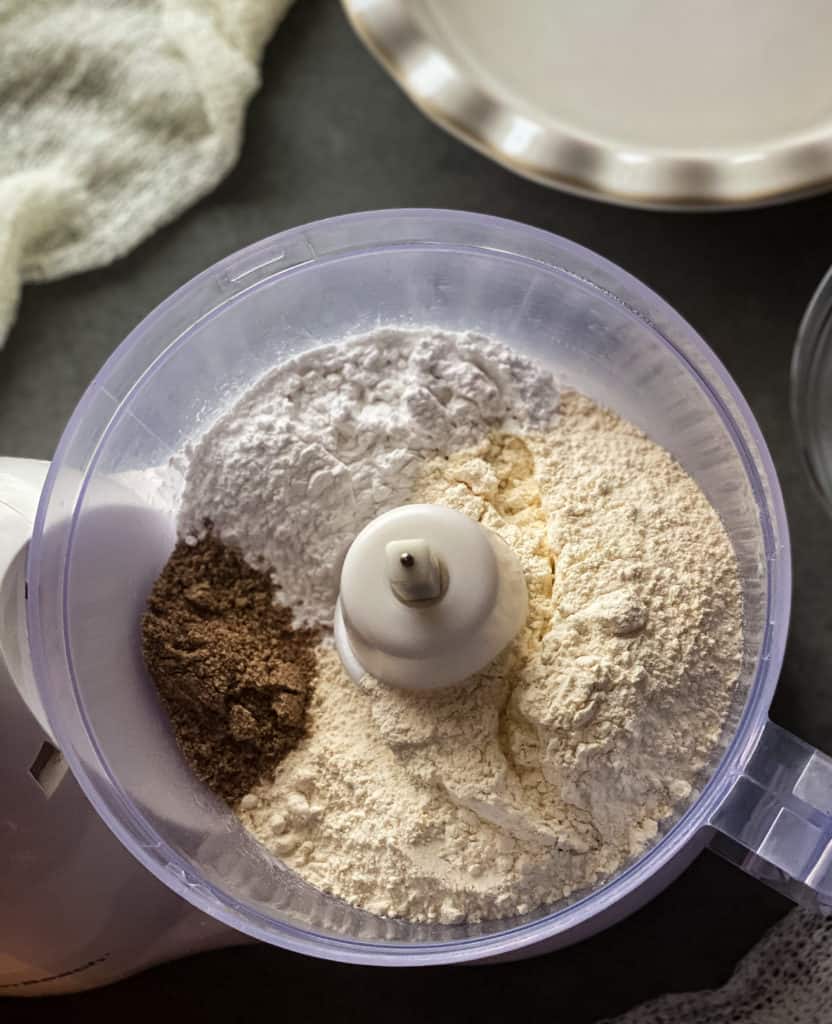
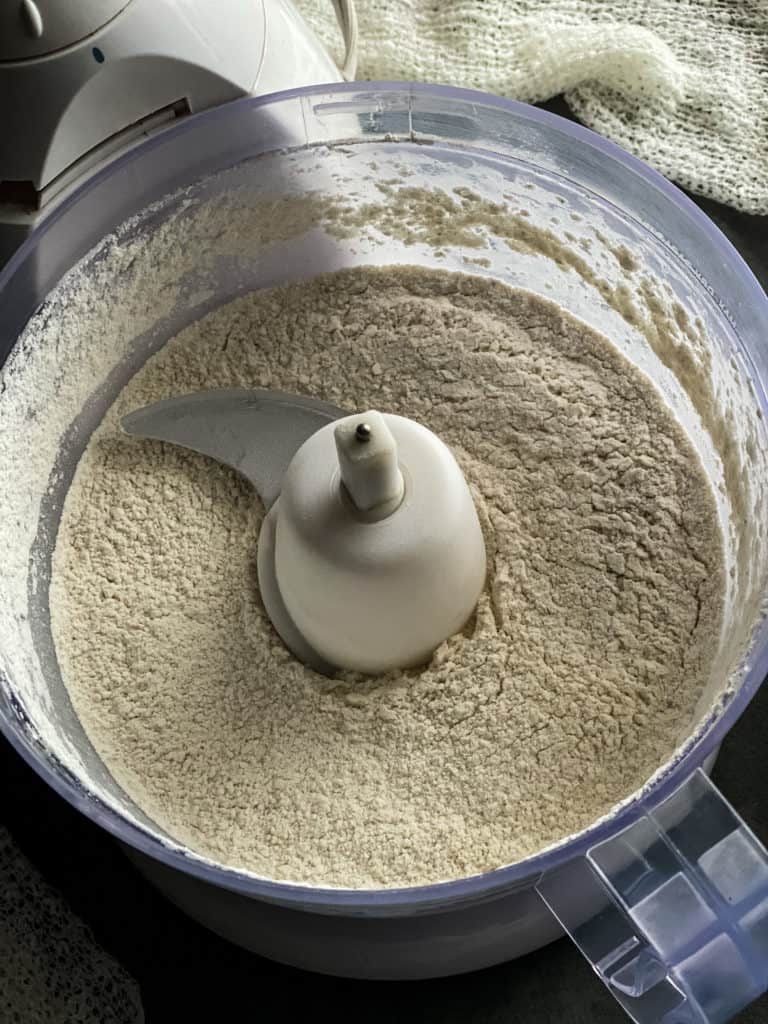
4. Add all of the dry ingredients (cassava, flax or chia, and starch) to the bowl of a food processor and give it a quick whir to mix it completely together.
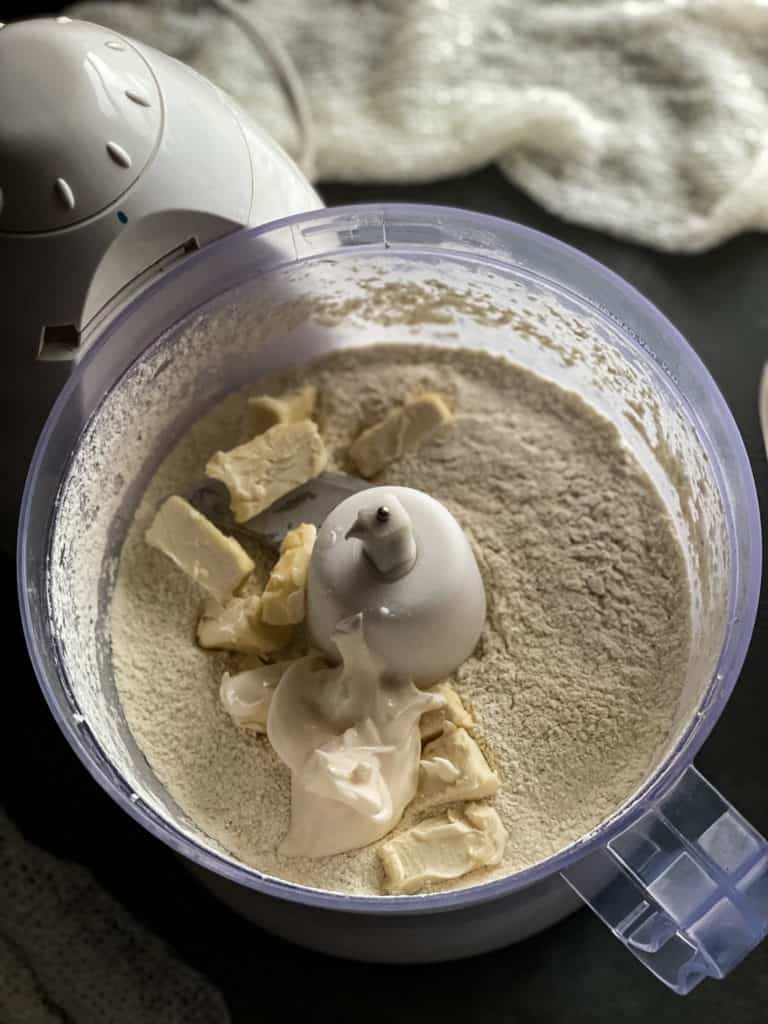
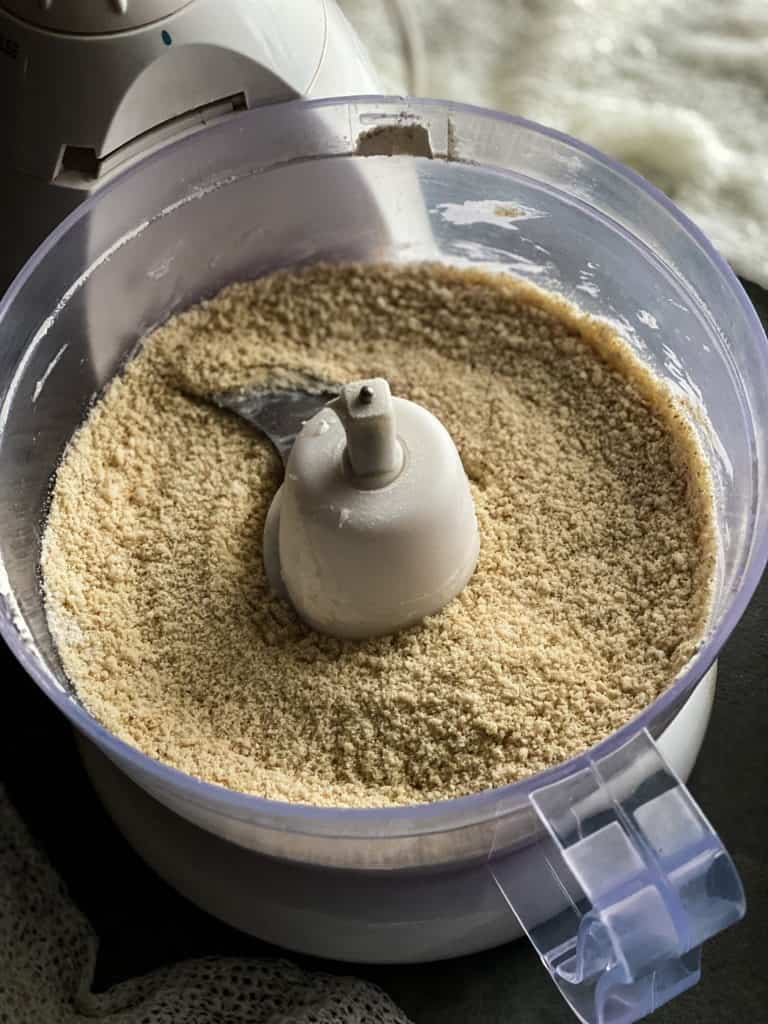
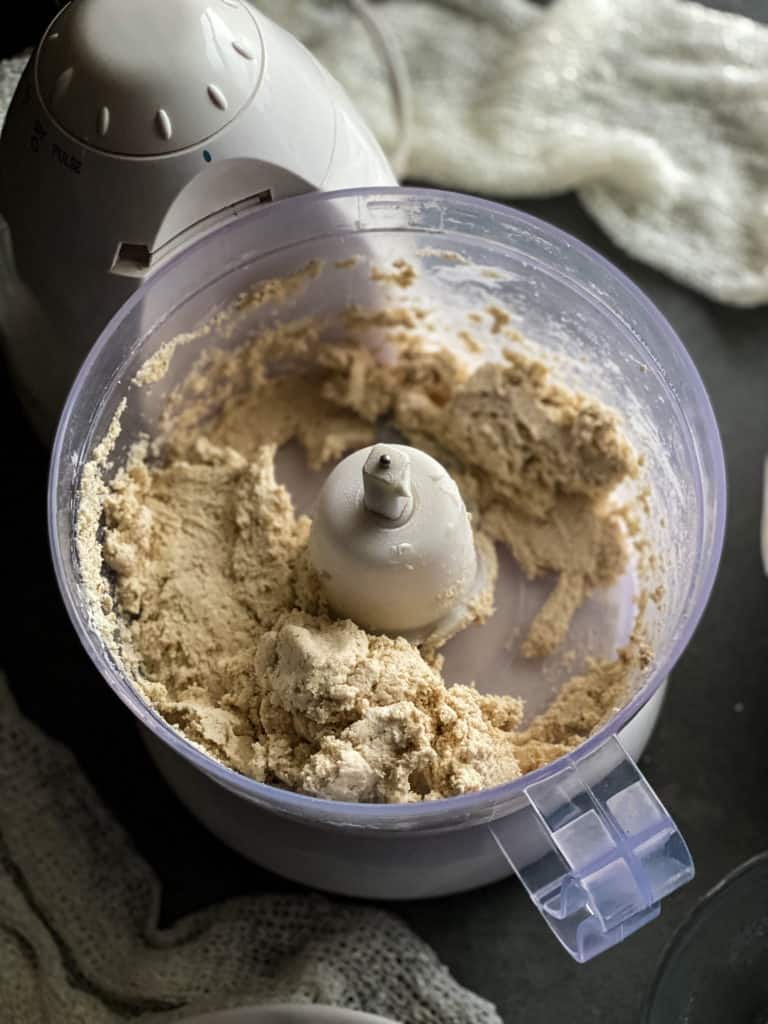
5. Once your butter/mayo has been in the freezer for at least 10-15 minutes, you can add it to your flour mixture. Pulse the food processor until the mixture looks like coarse sand.
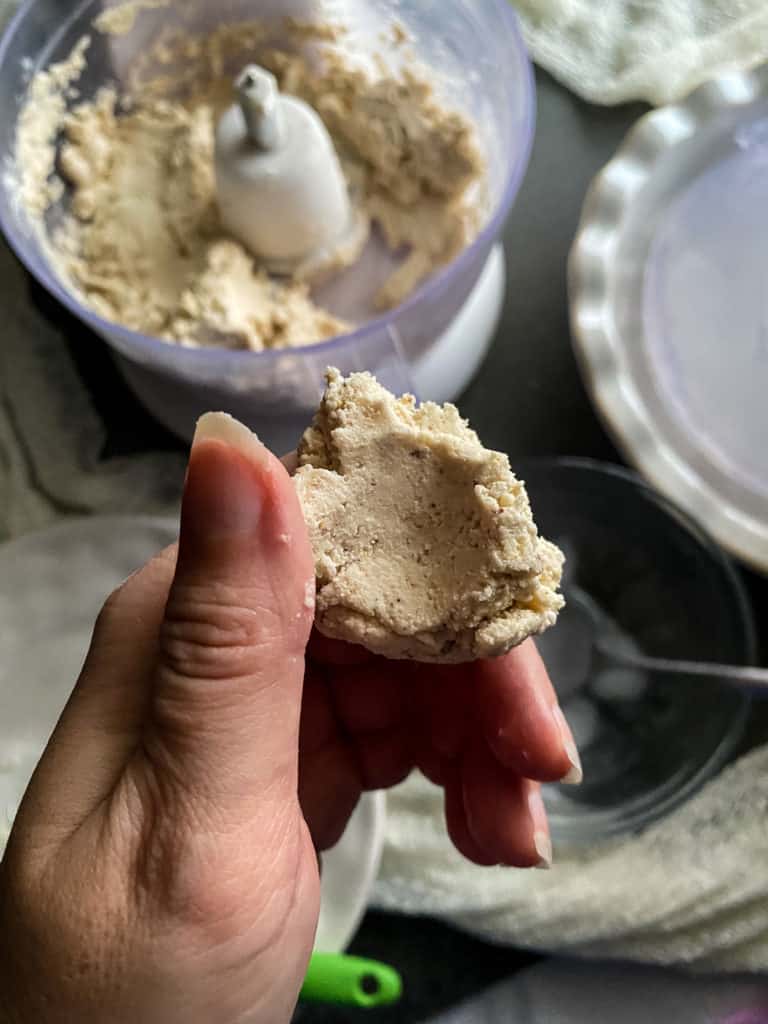
6. Add ice water while the food processor is running, a teaspoon at a time, until the mixture comes together into a smooth but wet dough. It’ll resemble wet clay. You should be able to pick up a piece and mold it, without it to you too much.
7. At this point, I turn on my oven and use the other half stick of butter to generously grease my pie plate. No, I don’t use the entire half stick. :p
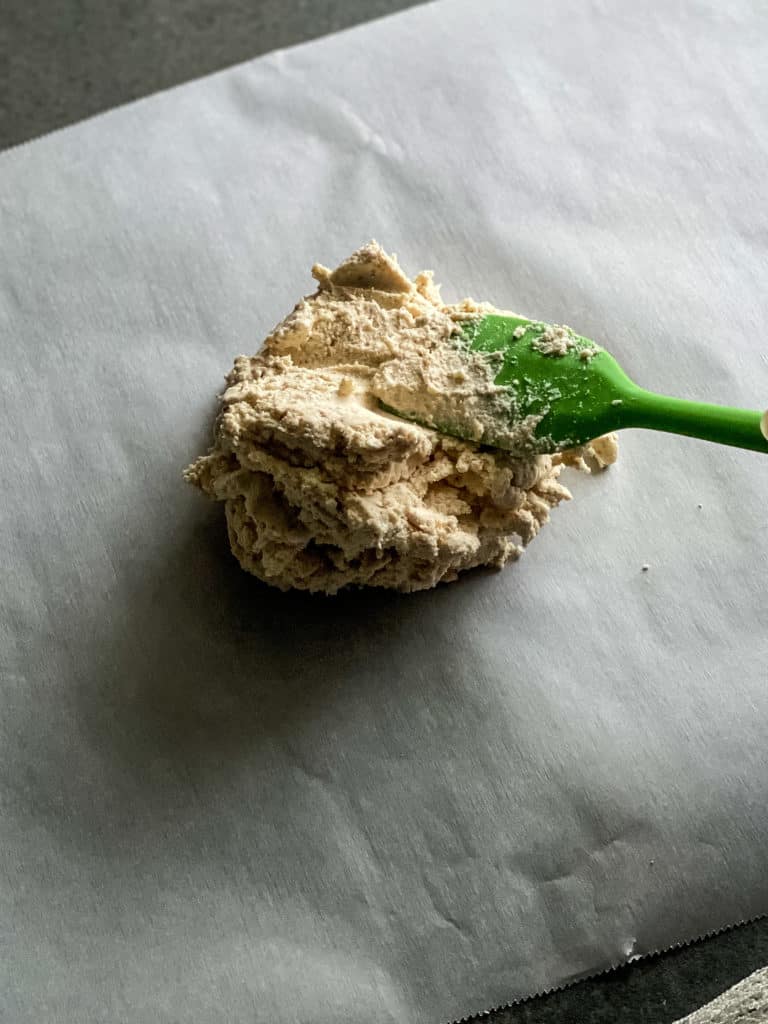
8. Lay out a sheet of parchment paper that is larger than your pie plate, and put your dough in the center of it. I use a spatula for this to make sure I get every last bit, because it likes to stick inside the food processor.
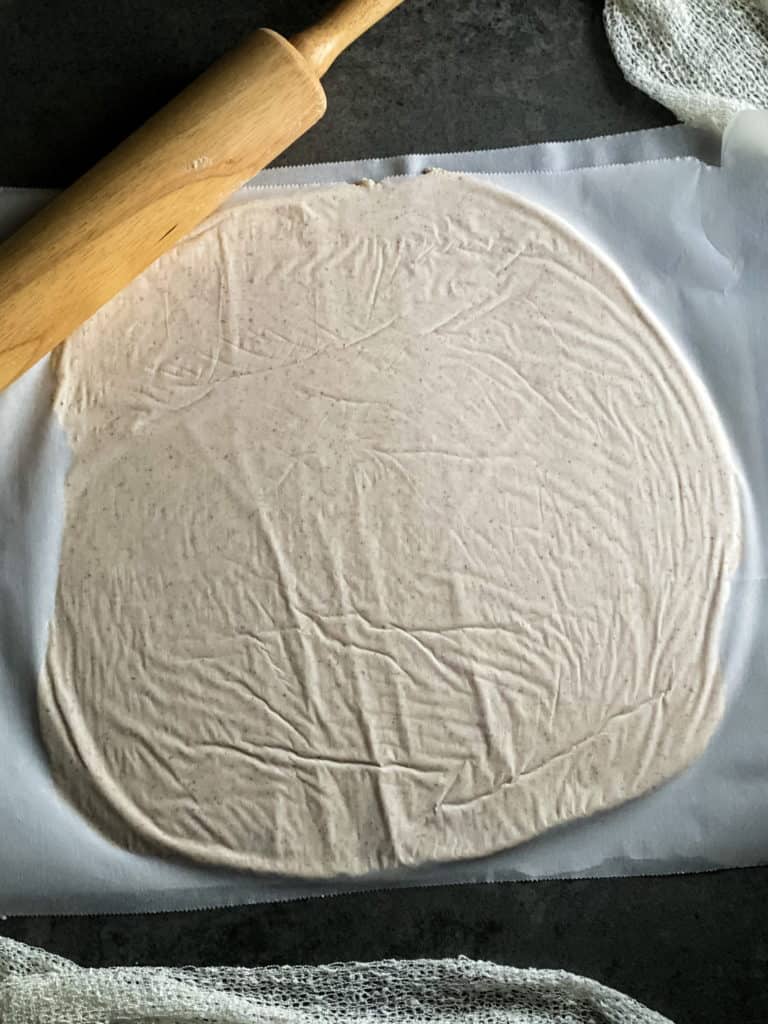
9. Place another large sheet of parchment paper on top of the dough, and roll it out. You want to the circle to be about 2″ larger than your pie plate.
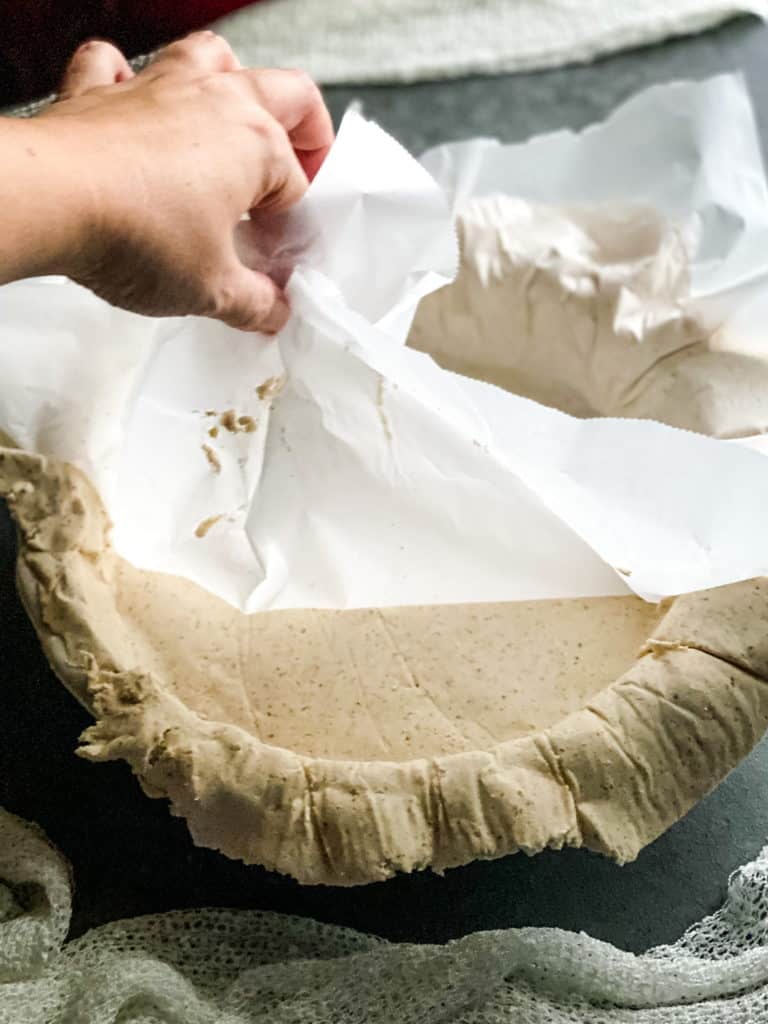
10. Very carefully peel off the top sheet of parchment, and flip it upside down into your greased pie plate. Gently press it down into the corners, making sure it seals to the shape of the entire dish.
11. Gently peel the parchment off the top of your dough. If you’re having a hard time doing this without ripping it, you can pop it into the freezer for 5-10 minutes. I find the easiest way is to grab the parchment and quickly press down, lift up, press down, lift up, press down, lift up. It helps convince the dough to release.
If any parts tear, fear not! Just press the dough back together. It’s super forgiving and very much like clay in that you can mold and form it.
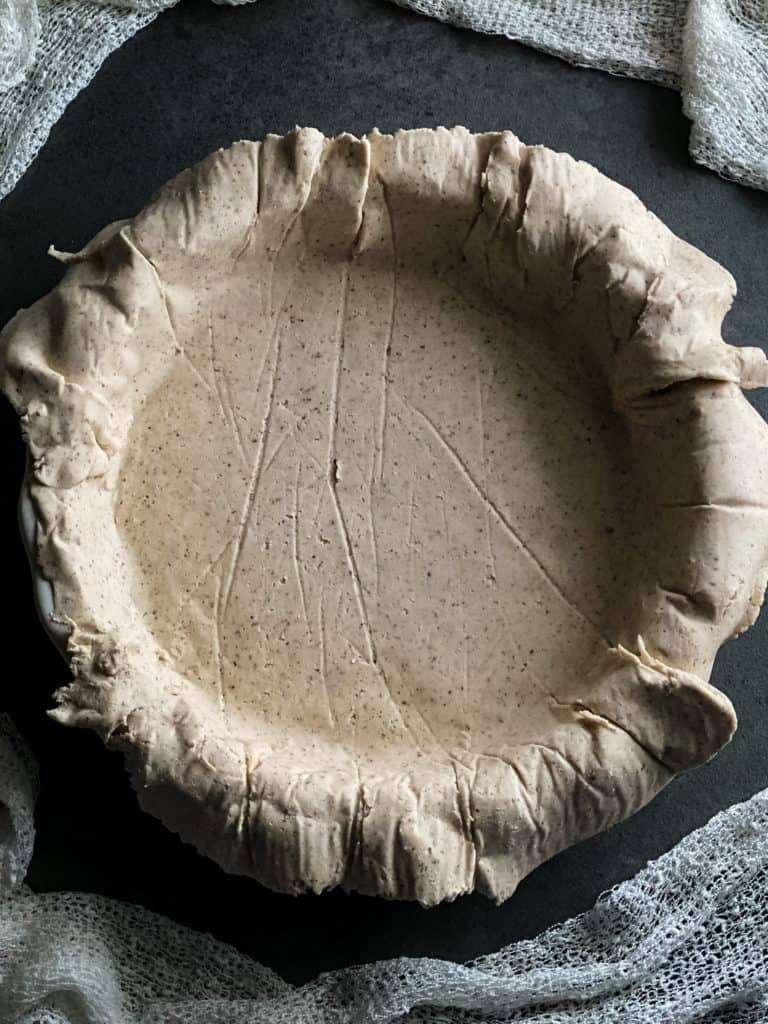
12. Cut or tear any excess off the edges of the pie plate. I save these extra bits to make pretty designs to put on top of the pie.
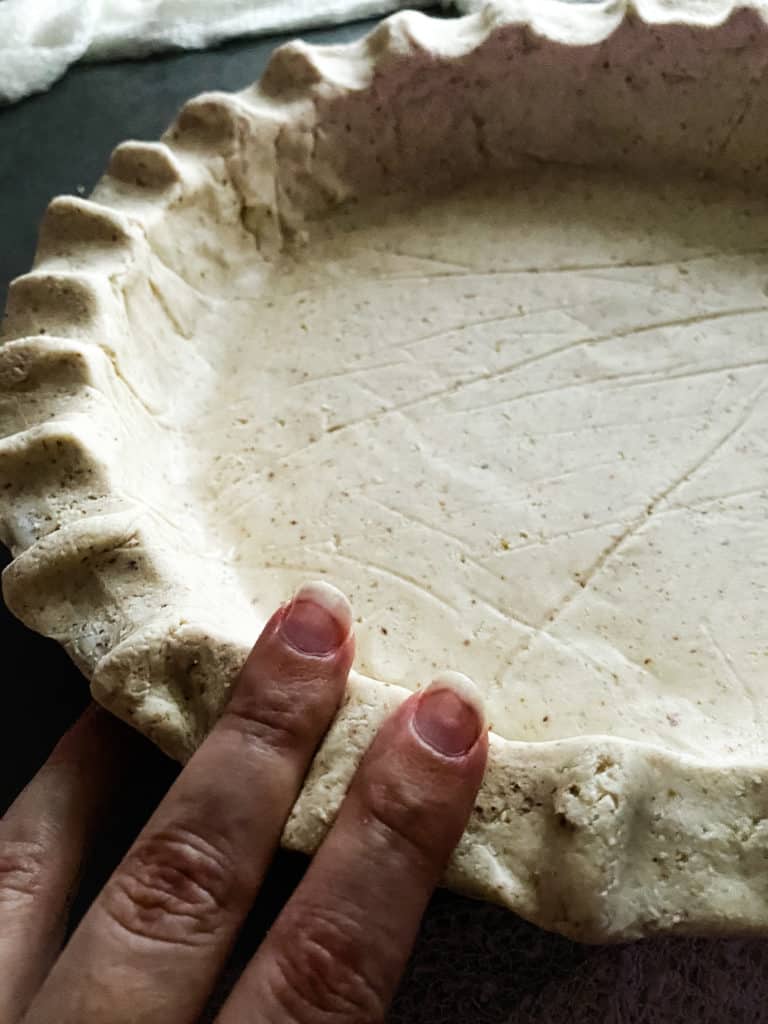
13. Use your fingers, a crimper, or a fork to make a pretty edge around the pie crust if you want to.
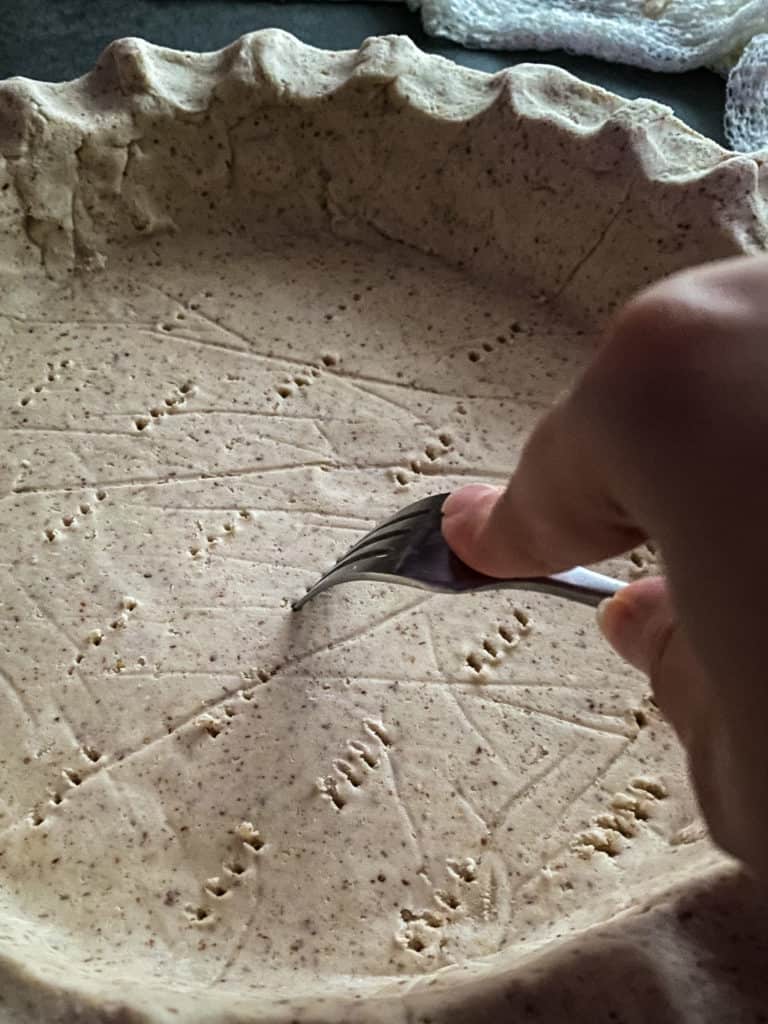
14. Using your sharp implement of choice, pierce holes all over the bottom and up the sides of the pie crust. This will allow steam to escape during baking.
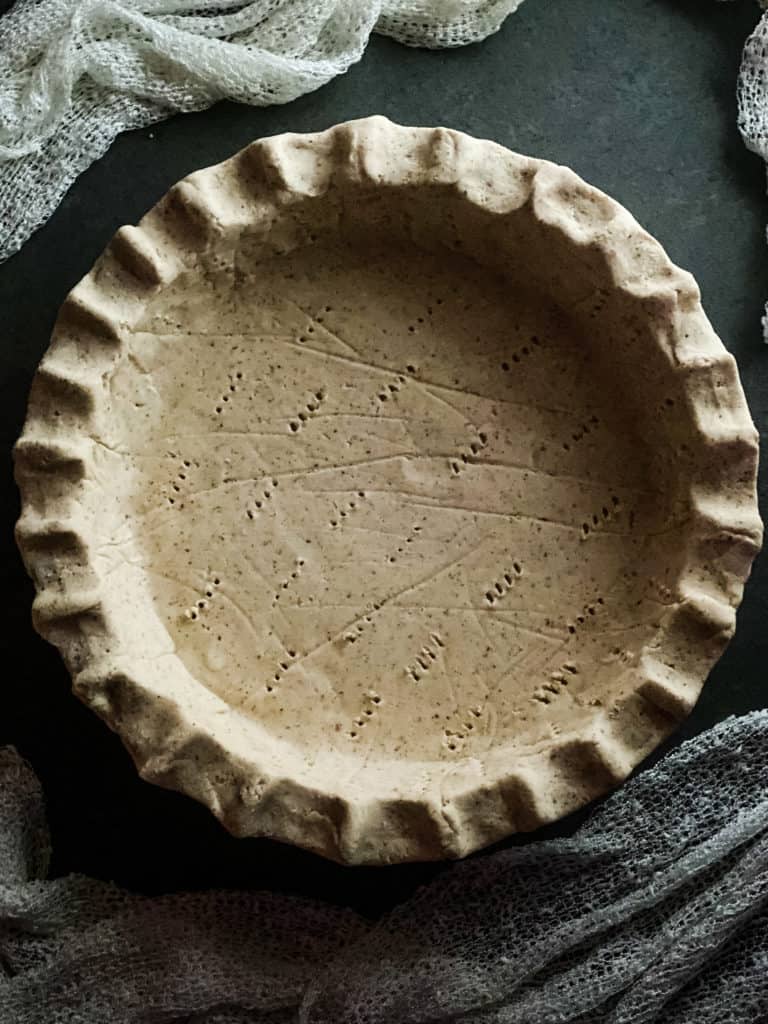
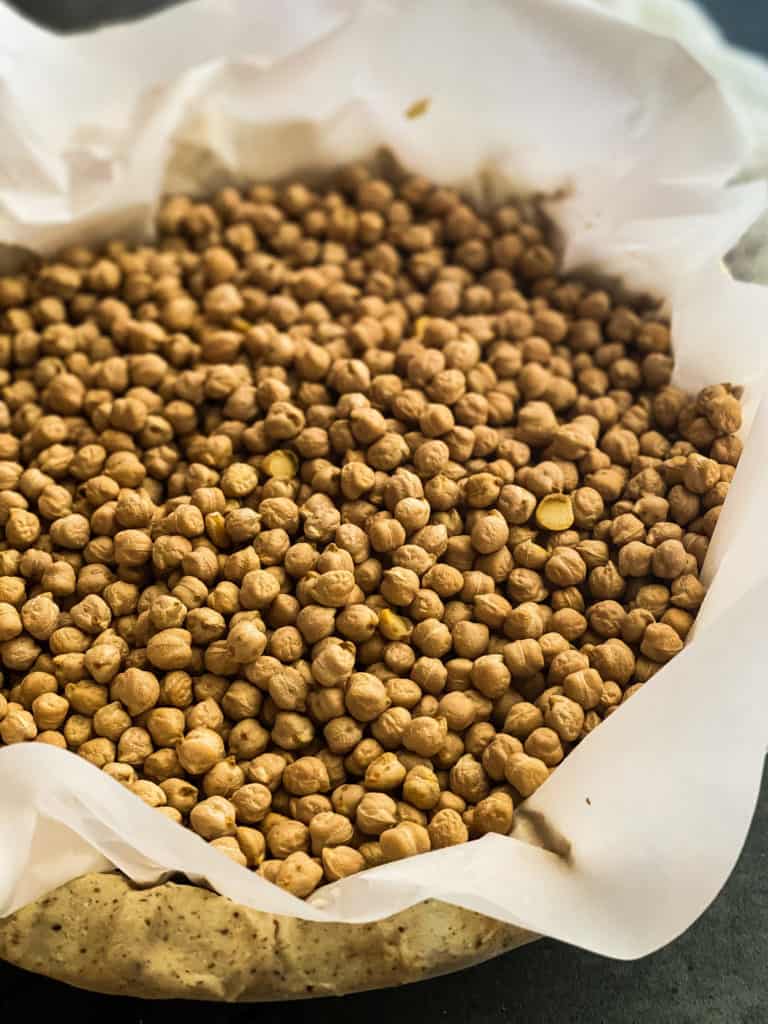
15. Once your pie crust is placed, crimped, and pierced, place one of your sheets of parchment paper back on top and fill it with dried beans or pie stones if you’re going to pre-bake it. Make sure you get the beans down into every nook and cranny, or the crust will bubble up.
16. Put the crust into the freezer for 10-15 minutes before popping it into your hot oven.
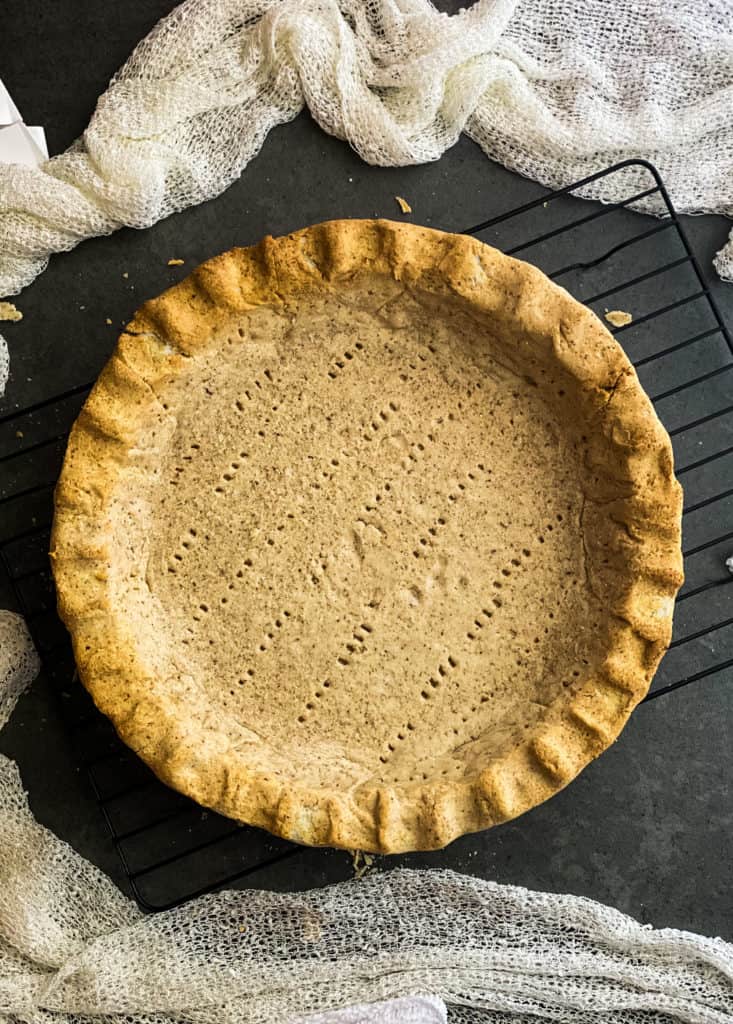
17. Bake for 20 minutes before removing the parchment with the beans/stones. Check to make sure the crust has set on the bottom. If it hasn’t, replace the parchment with beans/stones and give it another five minutes before checking again. Once it has set and you’ve removed the parchment and beans/stones, bake for an additional 10 until all the crust is crisp and golden brown.
18. Remove it from the oven and allow the crust to cool for at least an hour before filling.
19. If you decide to not pre-bake the crust, but bake it with the filling, you may want to cover the edges with aluminum foil or pie protectors if the baking time is longer than about 25 minutes.
Can I double the recipe?
You absolutely can double this recipe! If you need to make two pies, or make and cover a single pie, feel free to double this out. Keep in mind that the larger the batch, the quicker it’ll warm up though. You may need to pop things into the freezer occasionally to keep the dough workable.
Why did my gluten free pie crust come out so hard?
If your pie crust came out exceptionally hard, you probably overbaked it. Every oven is different, and yours may be hotter than mine. It’s a good idea to get an oven thermometer to be extra sure, but for next time try baking it a few minutes less.
Why did my crust stick to the pie plate?
If your pie crust stuck to the dish, you need to be more generous with greasing it before placing the dough in. Even if your pie plate claims that it is non-stick, sometimes they don’t live up to those claims.
Can I add anything to the edges to help them brown?
Absolutely! Any glaze you would use for a gluten-y pie crust would work here. My personal favorite is a little watered down apricot jam, but aquafaba or Just Egg also work great. Another amazing option is maple syrup mixed with soy milk.
That said, glazing the edges is not necessary for browning. This dough does a great job on its own, so feel free to skip this step if you don’t want the extra work!
What does this gluten free pie crust taste and feel like?
It honestly tastes like butter crackers. My daughter thought I made it out of Keebler Club crackers, actually. I dropped the first crust I made for the photos in this post, and we snacked on the shards as a family. It’s flaky and buttery, but sturdy and doesn’t fall apart easily. And it has a nice, velvety texture when you touch it.
How do I store this pie crust?
After filling it with pie, I stored mine in the refrigerator uncovered. Because I ran out of covers. Lol
I thought it would get stale and I would have to do a 10 minute quick bake at 300F (150C) to evaporate the staleness out, but it actually got better as the days went on.
So because of that, I would recommend storing it in the fridge, covered or uncovered.
Any suggestions on what to fill my gluten free pie crust with?
Heck yeah, I do!
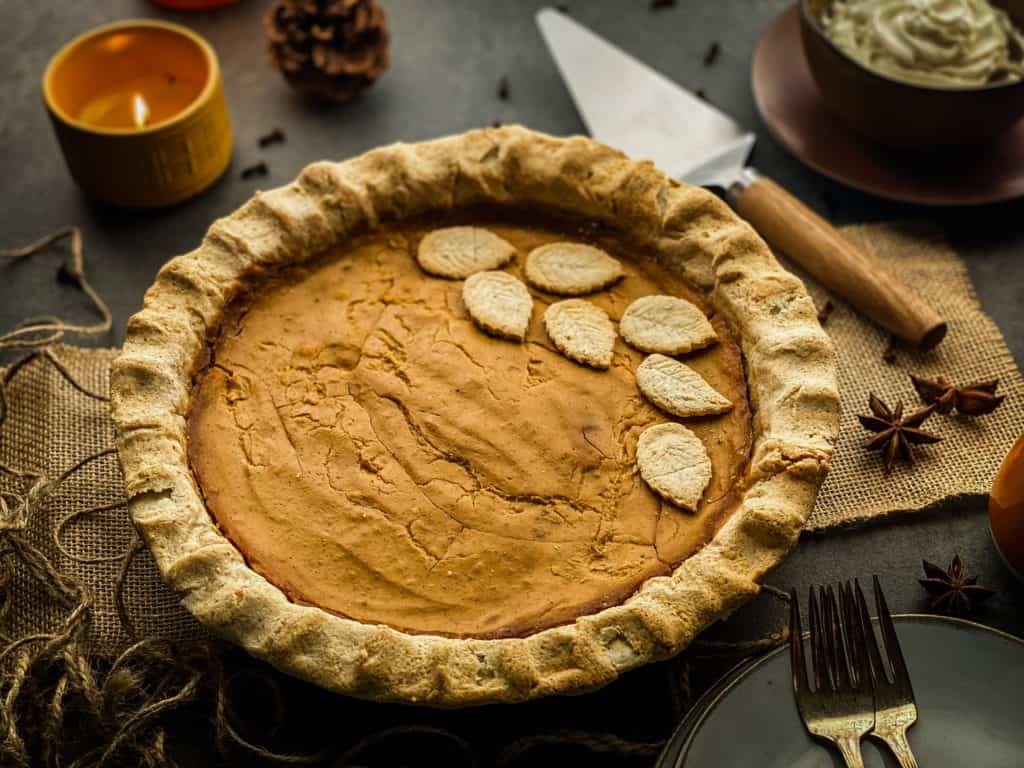
My pumpkin pie recipe will be published in just a couple of days – which is what I actually made this crust for. See the cute leaves I made out of the extra crust trimmed from the edges? I just rolled it out between the parchment sheets and used a fondant leaf plunger for them, and baked them for the last 10 minutes of the pie crust bake.
My friend Sara Kidd just released this amazing Custard Pie recipe that is gluten free, as well.
This cherry pie from Karissa’s Vegan Kitchen has a gluten-free, perfectly tart and sweet filling!
In the mood for something savory? How about a pot pie! This veggie pot pie from Evergreen Kitchen normally uses potato slices as the gluten-free “crust”, but you could totally use this one instead if you’re in the mood.
Thanks for stopping by!
I hope you found this gluten free pie crust recipe useful! Have you used cassava flour before? I had only used it in gravies but now I’m hooked on swapping it for all my flour-based everythings! And this pie crust is a testament that it’s a great choice.
Please let me know what you make with it!
May you and your coffee both be strong,
Meggan
Recipe:
Gluten Free Pie Crust made with Cassava (vegan, grain free)

This gluten free pie crust is easy with a buttery taste and flaky texture. It’s sturdy and delicious, made with cassava. Vegan and grain free.
Ingredients
- 1 cup (135g) cassava flour
- 1/4 c (40g) tapioca or arrowroot starch*
- 1 tbsp ground flax or chia
- 1/4 c (1/2 stick, or 55g) vegan butter, cold
- 1 tbsp vegan mayonnaise (use Sir Kensington's if avoiding corn and/or soy)
- Ice water
Instructions
- Slice the butter into small cubes and place on parchment paper with the mayonnaise. Put into the freezer for 10-15 minutes.
- Mix all of the dry ingredients (cassava, starch, flax or chia) in your food processor until they are well combined.
- Add the butter and mayonnaise to the food processor, and pulse until the mixture looks like coarse sand.
- Add ice water while the food processor is running, a teaspoon at a time, until a moldable dough comes together.
- Preheat your oven to 375F (190C) and grease your pie plate.
- Roll the dough out between two large sheets of parchment paper until it is approximately 11" in diameter.
- Gently remove the parchment sheet from the top of the dough, and flip the dough into your pie plate.
- Carefully press the dough down into all the corners of the pie plate, and remove the parchment paper from the top.
- Press any tears back together, cut off the excess dough, crimp if desired, and pierce all over the bottom and up the sides of the dough with a fork or sharp knife.
- Put a sheet of parchment back into the pie plate and fill it with dry beans or pie stones to weigh the crust down as it bakes. It will bubble up if you don't do this.
- Put the pie plate into the freezer for 10-15 minutes.
- Transfer the pie plate into the hot oven and bake for 20 minutes before removing the parchment and beans/stones. Make sure the crust has set on the bottom, if not, replace the parchment and beans/stones and bake for another 5 minutes before checking again.
- Bake for another 10 minutes until the crust is golden brown all over.
- Remove the pie plate from the oven and allow it to cool for at least an hour before filling.
Notes
*If you want to use potato or corn starch instead, reduce the amount by half to two tablespoons.
Please see the blog post for more information of ingredient substitutions and step-by-step photo instructions.