• Menu
  • Skip to left header navigation
  • Skip to primary navigation
  • Skip to main content

Before Header

Cooking on Caffeine

making family-favorite recipes vegan and allergy-friendly

Header Left

Header Left

  • Recipes
    • Desserts and Pastries
      • Vegan Macarons: Recipes and Resources
      • Icings, Frostings, Toppings, and Fillings
      • Cakes
      • Cookies
    • Main Dishes
      • Vegan Quick and Easy Mexican Red Pozole/Menudo (Instant Pot)
      • Easy Creamy Vegan Tomato Basil Sauce
    • Sides
      • Gochujang Spicy Brussels Sprouts (Vegan)
      • Sautéed Basil Cucumbers and Grapes
    • Sauces, Condiments, and Cheeses
      • Easiest Vegan Cheese Sauce Ever *BASE RECIPE* (no blender needed!)
      • Easy Vegan Cheese for Pizza (Nut-Free, No Blender)
      • Vegan Choriqueso (Queso Dip with Chorizo)
      • Vegan Cream Cheese Filling for Danishes
      • Easy Creamy Vegan Tomato Basil Sauce
  • Vegan Macarons
    • Vegan Macarons: Recipes and Resources
    • Macaron Troubleshooting Series
    • Icings, Frostings, Toppings, and Fillings
  • Blog
    • Silk Vegan Heavy Whipping Cream Review
    • Three Common Kitchen Mistakes
    • 21 Amazing Vegan Chickpea Recipes
    • Insert Change Now
  • My Story
  • Amazon Shop

cake

Chai Spice Cake (Vegan, Soy-Free, Nut-Free, One-Bowl)

November 8, 2019 //  by Meggan Leal//  Leave a Comment

Pumpkin spice needs to move over, because chai is the fall flavor that is going to fill you with autumnal warmth this year! Warm Indian spices including cinnamon, cardamom, anise, and black pepper turn my favorite hot latte from beverage to show stopping dessert.

Chai Spice?

First off, what the heck is chai?

Well, chai is my favorite tea! Lol. But it’s so much more than that. It’s funny because the word chai actually means tea in India. So my favorite flavor of tea is.. tea. In India this would be known as masala chai – which simply means mixed spiced tea.

But unlike here in the United States, tea in India isn’t just some black tea steeped in hot water – it’s full of warming aromatic spices, and prepared with hot milk and is served sweetened – hence it being masala – or mixed spices.

The spices used can vary, but generally include cinnamon, cardamom, cloves, and star anise. I love the ones that also include ginger and black pepper. Some have orange peel and vanilla added. Even coriander and fennel can make appearances! And then of course, there is tea – black tea.

I love chai tea. But I do not mix my own. And I’m not going to pretend to be an expert on it here – because I’m not. I don’t even know 1/10th of 1% of Indian cuisine or culture or the significance of these ingredients to the wonderful people of the country.

I also don’t know anything about tea. What kinds of tea leaves? Heck if I know. Black. Lol. I also like green tea and jasmine tea. And hibiscus tea is wonderful! Those aren’t usually used in Indian teas as far as I know, but that’s pretty much the extent of my knowledge there.

But I love chai tea.

If you want to learn more about Indian tea and how to prepare it authentically, my friend Anushree has an amazing food blog with a great post containing everything you could want to know about it. Head on over there if you want to give it a shot yourself. 🙂

So how am I going to make chai spiced cake if you’re not going to teach me how to make chai spice?!

Good question!

I let the experts do the mixing.

I buy chai tea from the store. I make some, with almond or oat milk, I sweeten it with a little sugar. And I judge – usually not harshly, because apparently I love all chai teas that exist on the market. And if I like the chai tea I’m drinking, I will use those tea bags in my chai spiced cake. With the same milk I used to prepare my tea, and the same sugar I used to sweeten it.

I literally transform my chai tea latte into a cake. And now you can too!

The Ingredients

The ingredients here are pretty simple and straight forward; nothing too fancy or hard to find.

  1. Flour. The flour I use here is all purpose wheat flour. Not self-rising, not cake flour, not bread flour, not any of that. Just plain ole AP flour. You can substitute your favorite gluten-free alternative if you’d like – Bob’s Red Mill Gluten Free All Purpose Baking Flour is my favorite. The longer the name, the better the results. 😉 Follow the instructions on the bag.
  2. Sugar. I use Zulka brand granulated sugar. It’s the same as traditional white granulated sugar, but it hasn’t been filtered through bone char – meaning it’s vegan (that’s right, most American sugars aren’t vegan). It has a slight amber color and gorgeous caramel notes in the flavor. You can use whatever your favorite granulated sugar is, though.
  3. Baking soda. Also known as bicarbonate or bicarb, it’s much more than just for deodorizing you’re freezer or adding to toothpaste! And it is NOT the same thing as baking powder. So make sure to use soda and not powder here (that’s the number one mistake made in my recipes).
  4. Salt. Use whatever. I add it to enhance the flavors and balance out the sweetness a bit. Pink, white, sea, kosher – pick your poison. You could even use black salt if you wanted to give the cake a bit of an eggy taste.
  5. Chai tea! Like I said above, I use the same bags for cake making as I enjoy for drinking.
  6. Milk. Whichever plant milk is your favorite will probably do great here. I love using almond milk and soy milk in my cakes – so I choose based on whether my clients want to avoid one or the other. I opt for unsweetened vanilla to amp up that flavor.
  7. Vinegar. Any vinegar will do! I use white because it’s cheap, but I’ve also used apple cider vinegar and rice wine vinegar in a pinch. And if you can’t have vinegar, use lemon or lime juice! All we are looking for is an acid to react with the baking soda to fill our cake with tiny bubbles – turning it into a sponge.
  8. Vanilla. Whatever your favorite is – either real or synthetic, just make sure it’s not made with beaver butts. Yes, you read that right.
  9. Butter/oil. For cakes that will be stacked or carved, I recommend using your favorite vegan butter. It will give your cake a firmer structure allowing you to manipulate it without it falling apart on you. For cupcakes, oil is wonderful for giving them a light and airy texture – not great for stacking and carving, but perfect for cupcakes!

The Method

The first thing you’re going to do is pick out a chai tea that you like to drink. The best way to figure this out is to buy some, make it, and drink it. And my favorite way to do this is to steep it in hot almond or oat milk with a touch of sugar added.

Love the H-E-B brand Chai, but if you’re not fortunate enough to have an H-E-B near you, I really like the Stash brand Double Chai, as well (it’s made with cinnamon and clove oil that pops really well in the cake, though it doesn’t contain black pepper – so add some if you want it spicier).

One batch of this recipe is going to take five tea bags worth of tea. So get five envelopes out, rip em open, and pull the bags out.

Using a pair of scissors, snip off the top of each bag. Keep in mind that the tea bag might actually just be a folded tube, so make sure you hold on tight or you’ll make a big mess! Once you snip one, dump the contents into a coffee/spice grinder before moving on to the next.

If you don’t have a grinder, that’s fine – just dump the tea into your flour mixture as is. Your cake will just have larger flecks instead of a smoother color. And if you don’t want to do that, then steep ten bags in your hot milk instead.

Once you’ve unloaded the contents of your five tea bags into the grinder, give it one nice sniff before closing it and buzzing it into a fine powder.

After grinding the tea, I advise letting it settle in the grinder for at least five to ten minutes before attempting to open it. It’s going to be a spicy cloud that will likely make you cough and gag if you open it before that. Direct inhalation of cinnamon and black pepper is never a good thing, people.

In the meantime, whisk your dry ingredients in a large mixing bowl – that would be your flour, sugar (yes, it counts as a dry ingredient in whacky cake recipes – which this is), baking SODA, and salt.

Once you’ve mixed your dry ingredients together and your chai powder has had the chance to settle, dump the contents of the grinder into your bowl.

Gently whisk your chai powder into your dry mix until it’s well combined.

Once your chai and dry are combined, make three wells in the mixture – one large and two small. Into the first small well, pour in your vanilla. The second small one will get your vinegar. And the large well is going to get your melted butter or oil.

Do not mix, yet!

Once you’ve made and filled your three wells, pour your hot milk over the entire bowl.

Gently stir the hot milk into your dry mixture until it’s just combined and you don’t see any dry patches anywhere.

Pour your batter into prepared cake pans or cupcake tins.

Bake cakes at 325F (162C) for 45 minutes, or until a toothpick inserted into the center of the cake comes out dry (the time will depend on the size and depth of your cake pans, as well as your individual oven). Cupcakes take around 17 minutes.

Let the cake cool completely before decorating with your preferred frosting. My favorite is my American Meringue Buttercream with 12 drops of LorAnn lavender oil added.

The cake can be stored covered at room temperature for up to a week, or wrapped well (double wrapped in plastic film) and frozen for up to six months.

Pin It!

Whacky Cake Recipe Tutorial Video:

This video is for my chocolate whacky cake, but the process is the same – just using chai tea powder instead of cocoa powder and hot milk instead of coffee.

Recipe:

Yield: 1 10", 2 8", 3 6" cakes, or 24 cupcakes

Chai Spice Cake (Vegan, Soy-Free, Nut-Free, One-Bowl)

Chai Spice Cake (Vegan, Soy-Free, Nut-Free, One-Bowl)

Pumpkin spice needs to move over, because this is the fall flavor that is going to fill you with autumnal warmth this year! Warm Indian spices including cinnamon, cardamom, anise, and black pepper turn my favorite hot latte from beverage to show stopping dessert.

Prep Time 10 minutes
Cook Time 45 minutes
Total Time 55 minutes

Ingredients

  • 4 cups all purpose flour (480g)
  • 2 cups sugar (400g)
  • 2 tsp baking soda (bicarb) (12g)
  • 1 tsp salt (6g)
  • 5 chai tea bags (10 if you don't have a spice/coffee grinder)
  • 2 tsp vanilla extract (10ml)
  • 2 tbsp vinegar (30ml)
  • 3/4 cup of vegan butter/margarine, melted (you can use oil, see notes below) (175ml)
  • 2 cups plant milk, hot (475ml)

Instructions

  1. Preheat your oven to 325F (162C)
  2. Prepare your cake pans with nonstick spray and parchment paper circles on the bottom
  3. Empty the contents of your tea bags into a coffee/spice grinder and blitz until it's a fine powder and let it rest for five minutes without opening (see recipe notes if you don't have a grinder)
  4. Whisk together your flour, sugar, baking soda, and salt in a large mixing bowl
  5. Gently stir your chai tea powder into the dry mix
  6. Create three deep wells in your dry mix
  7. To the first well, add your vanilla. To the second, add the vinegar. To the third, add the melted butter/oil
  8. Pour your hot milk over the entire mixture
  9. Gently whisk or fold your batter until it's well combined and no dry bits remain
  10. Divide your batter evenly among your prepared pans
  11. Bake for 45 minutes or until you insert a toothpick into the center of the cake and it comes out clean (cupcakes only need about 17 minutes)
  12. Remove your cakes from the oven to a cooling rack. Let it sit in the cake pan for five minutes before turning it out. Let cool completely before frosting.

Notes

*This can be made with your favourite cup-for-cup gluten-free flour if you want to make a wheat-free version.

*For a no-sugar-added version, use a cup-for-cup Stevia baking blend in place of the granulated sugar.

*Using melted butter is recommended for stacked or carved cakes. Oil is best for cupcakes as it results in a fluffier texture.

*For soy-free, use melted Country Crock Plant Butter sticks (avoiding the almond one if you have a nut allergy) or Miyoko’s butter if you’d like to also avoid palm-oil. Or use a non-soy oil instead.

*If you don't have a coffee/spice grinder, feel free to add the contents of the tea bags as is to the dry mix. It will leave larger flecks in the finished cake and won't give you as a smooth of a color. If you still want a smooth color, try steeping ten tea bags in your hot milk instead of grinding the contents of five.

© Meggan Leal
Cuisine: American / Category: Desserts and Pastries


Allergy-Friendly and Vegan Pastry Recipes:

Vegan Gingerbread Cookies – Chai Espresso

Vegan gingerbread cookies with a little something extra – chai and espresso! Spicy, no-chill,…

Vegan Gingerbread Cookies – Chai EspressoRead More

Vegan Brownies from Box Mix

Vegan brownies from box mix is easy. I’ll show you how to do it,…

Vegan Brownies from Box MixRead More

Cover photo for Mottled Macaron Troubleshooting

Macaron Troubleshooting: Mottled Macarons and 10 Ways to Prevent Them

Why are my macarons mottled and stained on top? Learn what causes it and…

Macaron Troubleshooting: Mottled Macarons and 10 Ways to Prevent ThemRead More

Cover photo for Burning Bottoms post

Macaron Troubleshooting: Burning Bottoms

Why are my macarons burning on the bottom? Learn why the bottoms burn, and…

Macaron Troubleshooting: Burning BottomsRead More

melty vegan cheese sauce on a pizza

Easy Vegan Cheese for Pizza (Nut-Free, No Blender)

Vegan cheese for pizza that actually tastes good, is quick and easy to make…

Easy Vegan Cheese for Pizza (Nut-Free, No Blender)Read More

Vegan Cheesecake Dip (dairy-free, nut-free, coconut-free, cream-cheese-free)

Two inexpensive and easy-to-find grocery items combine to perform magic in this simple but…

Vegan Cheesecake Dip (dairy-free, nut-free, coconut-free, cream-cheese-free)Read More

Koala Macaron Template cover photo

Koala Macaron Template & Tutorial

To support ongoing bushfire relief efforts in Australia Printable pdf macaron template and tutorial…

Koala Macaron Template & TutorialRead More

Silk Vegan Heavy Whipping Cream Review

Wondering if the new dairy-free, vegan heavy whipping cream alternative from Silk is perfect?…

Silk Vegan Heavy Whipping Cream ReviewRead More

Vegan meringues

Easiest Vegan Meringue Cookies Ever with Aquafaba

Vegan meringue cookies are super easy to make, with ingredients you probably have right…

Easiest Vegan Meringue Cookies Ever with AquafabaRead More

Category: Cakes, Desserts and PastriesTag: cake, coconut-free, Dairy-Free, Egg-Free, Nut-free, Peanut-Free, Soy-Free, Vegan

Chili Lime American Buttercream (vegan, soy-free)

October 15, 2019 //  by Meggan Leal//  Leave a Comment

This buttercream not only has an addictive spicy kick, but its tangy sweetness will have you looking for new and creative combinations and vehicles for getting it from bowl to mouth. It’s dairy-free, vegan, soy-free as long as you use the recommended ingredients, and I won’t tell anyone if you accidentally make a double batch.

Best coupled with fruit flavored confections, it uses fresh key lime juice in place of your usual cream or milk as well as the vanilla in American buttercream. I like to add yellow coloring to mine, since I most often pair it with mango smoothie cake for my famous Mangonada Cake and Mangonada Macarons. If you want to avoid dyes, use turmeric to turn it vivid yellow!

For the fruit chili powder, Trechas is my favorite brand (when I lived in Mexico, my host families only used Trechas brand, so that’s all I buy, now). If you’re wanting to avoid sugar or dyes, Tajin is a great choice as well.

And as far as butter goes, I use Country Crock Plant Butter sticks now, and it’s what I recommend. If you don’t have access to it or want to use something else, check out this post that covers vegan butters and how to make them work for your buttercream.

Video Tutorial

My buttercream tutorial on YouTube for the visual learners

Recipe

Yield: 2 cups (enough to frost a two-layer 6” cake)

Vegan Chili Lime Buttercream

Vegan Chili Lime Buttercream

The easiest vegan buttercream you’ve ever made - in sabor loco chili-lime! Four ingredients and ten minutes gets you perfectly pipe-able frosting for any confection that needs a spicy-sweet punch of tangy Mexican flavor!

Prep Time 1 minute
Cook Time 10 minutes
Total Time 11 minutes

Ingredients

  • 1 cup room temp high-fat vegan butter* (two sticks)(I prefer Country Crock Plant Butter sticks for best and soy-free results)
  • 3 cups powdered sugar (use Swerve Confectioner’s for a sugar-free version)
  • 2 tbsp + 1 tsp lime juice
  • 1-2 tsp chili lime fruit seasoning
  • Yellow gel food color

Instructions

  1. Add butter and two cups of powdered sugar to the bowl of a stand mixer equipped with the paddle attachment
  2. Mix on low/stir until completely incorporated
  3. Add the final cup of the powdered sugar and chili lime seasoning, and mix again on low/stir until completely incorporated
  4. Add your lime juice
  5. Mix on low until completely incorporated
  6. Use a rubber spatula to scrape the sides and bottom of your bowl
  7. Mix on low just until the mixture is fully combined and smooth
  8. Adjust the consistency by adding more juice by the teaspoon to thin, or more powdered sugar by the quarter cup to stiffen until desired consistency is reached

Notes

*For more info on vegan butters to use, check out my post at www.cookingoncaffeine.com/easiest-vegan-buttercream-ever

*If you use shortening, whip the mixture for 15 minutes or until it no longer has a greasy/waxy mouthfeel

*if you want the buttercream as silky smooth as possible, turn the mixer on low/stir and let it go for about a half an hour after you’re done mixing it

*for butter without palm oil, give Miyoko’s cultured butter a try

*for butter without soy, use Country Crock Plant Butter Sticks, Earth Balance Soy-Free, or Miyoko’s cultured butter.

*feel free to sift your powdered sugar if it’s very lumpy

*for crusting buttercream, add another one to two tablespoons of liquid, and use powdered sugar to bring back to consistency

© Meggan Leal
Category: Desserts and Pastries

Allergy-Friendly and Vegan Pastry Recipes:

Vegan Gingerbread Cookies – Chai Espresso

Vegan gingerbread cookies with a little something extra – chai and espresso! Spicy, no-chill,…

Vegan Gingerbread Cookies – Chai EspressoRead More

Vegan Brownies from Box Mix

Vegan brownies from box mix is easy. I’ll show you how to do it,…

Vegan Brownies from Box MixRead More

Cover photo for Mottled Macaron Troubleshooting

Macaron Troubleshooting: Mottled Macarons and 10 Ways to Prevent Them

Why are my macarons mottled and stained on top? Learn what causes it and…

Macaron Troubleshooting: Mottled Macarons and 10 Ways to Prevent ThemRead More

Cover photo for Burning Bottoms post

Macaron Troubleshooting: Burning Bottoms

Why are my macarons burning on the bottom? Learn why the bottoms burn, and…

Macaron Troubleshooting: Burning BottomsRead More

melty vegan cheese sauce on a pizza

Easy Vegan Cheese for Pizza (Nut-Free, No Blender)

Vegan cheese for pizza that actually tastes good, is quick and easy to make…

Easy Vegan Cheese for Pizza (Nut-Free, No Blender)Read More

Vegan Cheesecake Dip (dairy-free, nut-free, coconut-free, cream-cheese-free)

Two inexpensive and easy-to-find grocery items combine to perform magic in this simple but…

Vegan Cheesecake Dip (dairy-free, nut-free, coconut-free, cream-cheese-free)Read More

Koala Macaron Template cover photo

Koala Macaron Template & Tutorial

To support ongoing bushfire relief efforts in Australia Printable pdf macaron template and tutorial…

Koala Macaron Template & TutorialRead More

Silk Vegan Heavy Whipping Cream Review

Wondering if the new dairy-free, vegan heavy whipping cream alternative from Silk is perfect?…

Silk Vegan Heavy Whipping Cream ReviewRead More

Vegan meringues

Easiest Vegan Meringue Cookies Ever with Aquafaba

Vegan meringue cookies are super easy to make, with ingredients you probably have right…

Easiest Vegan Meringue Cookies Ever with AquafabaRead More

Category: Buttercreams, MacaronsTag: buttercream, cake, coconut-free, Dairy-Free, Dessert, Egg-Free, macarons, Soy-Free, Vegan

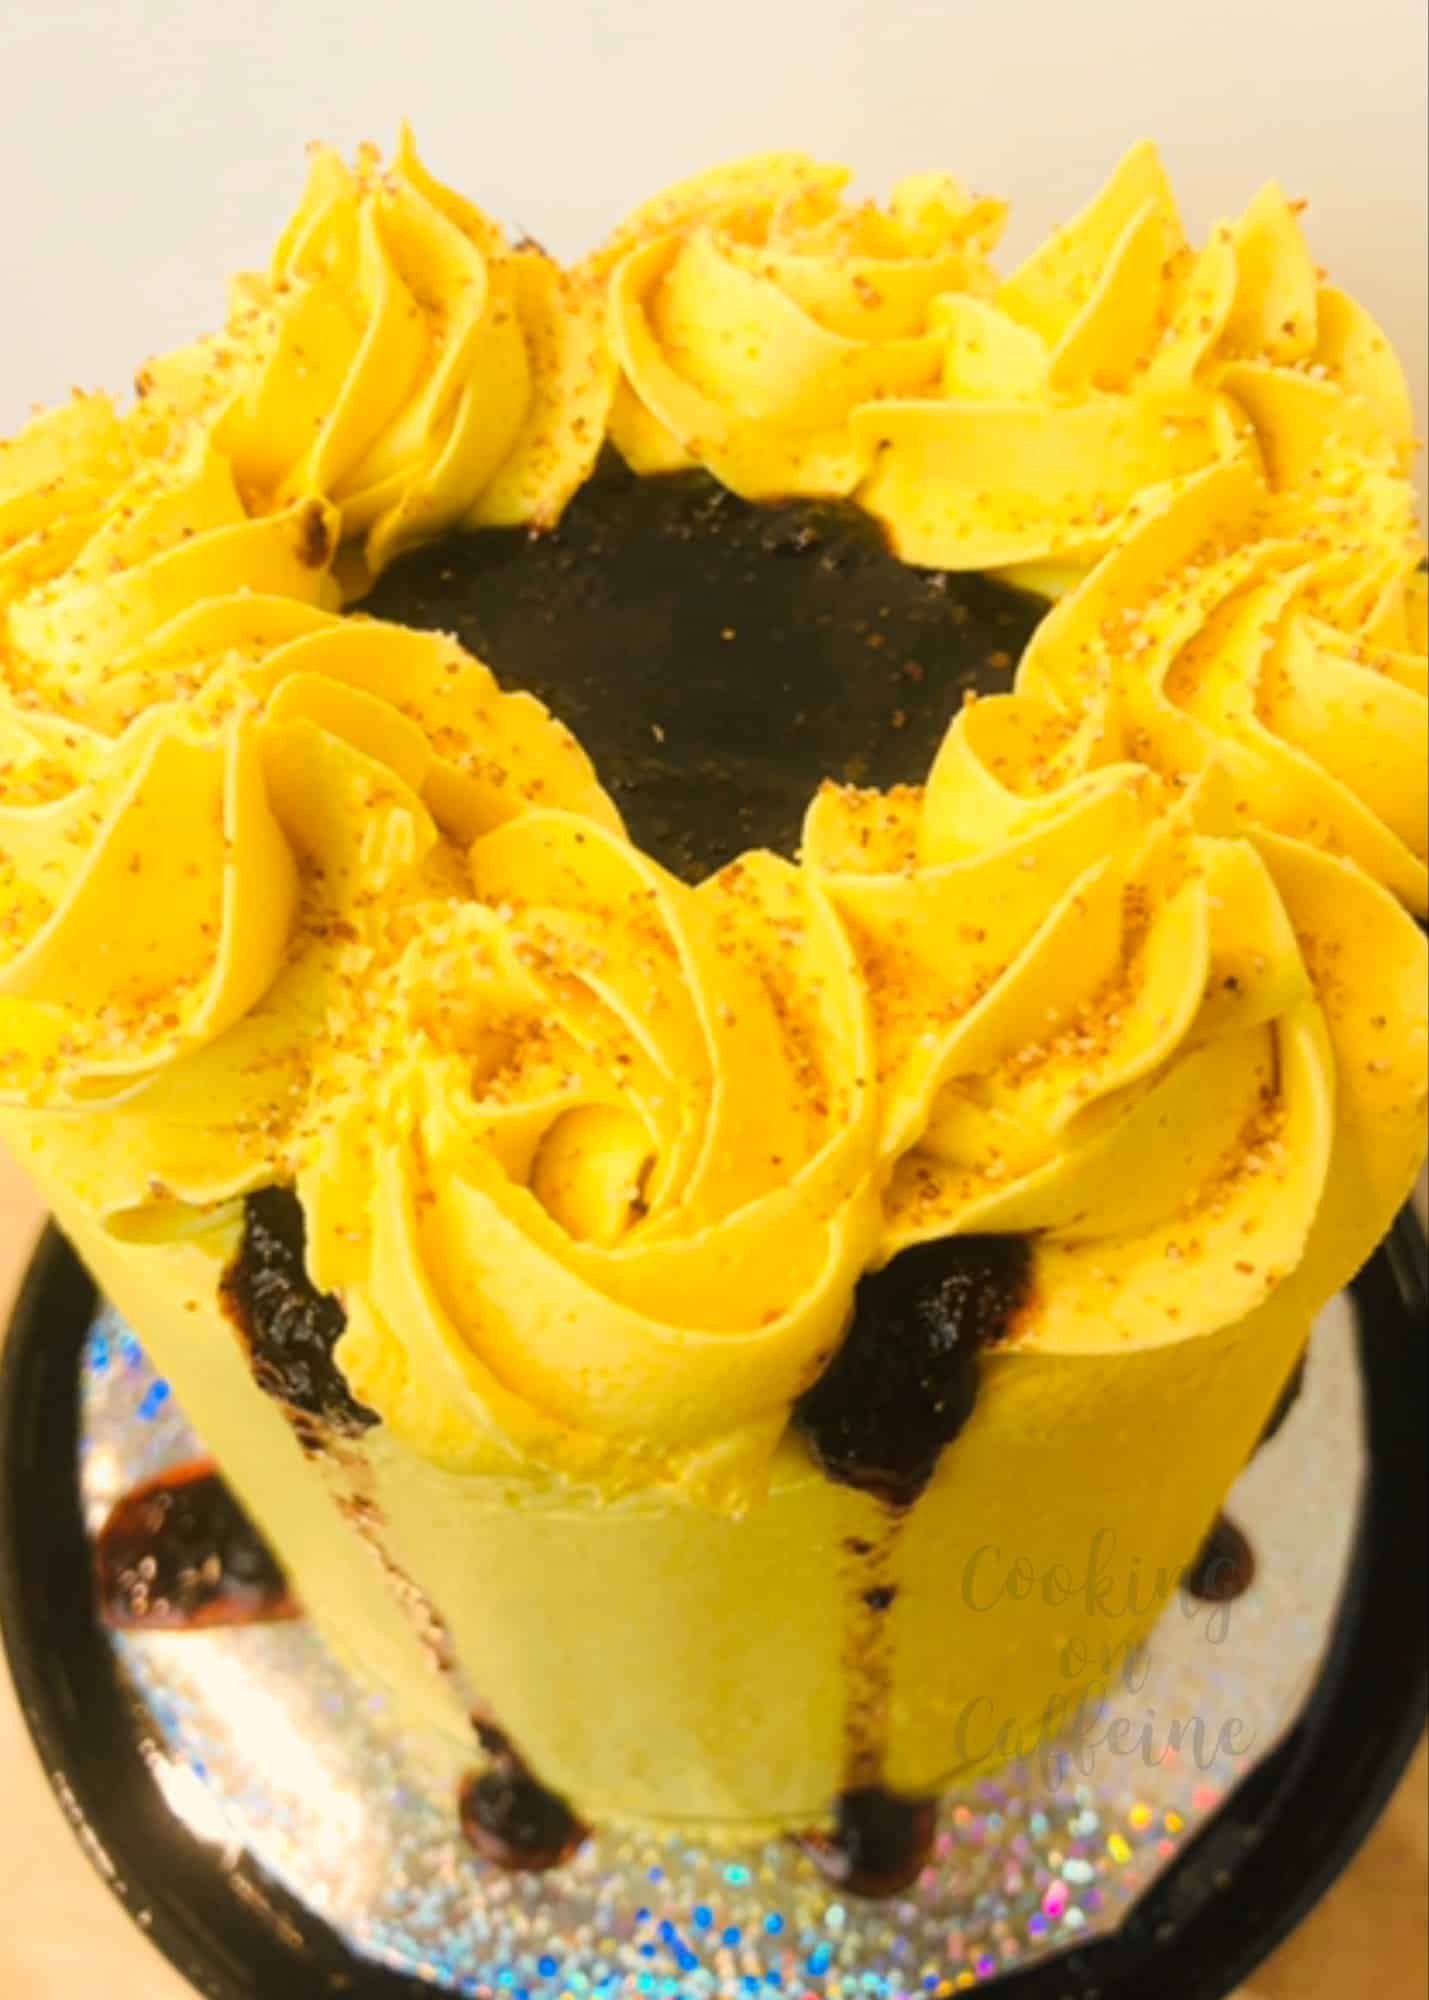
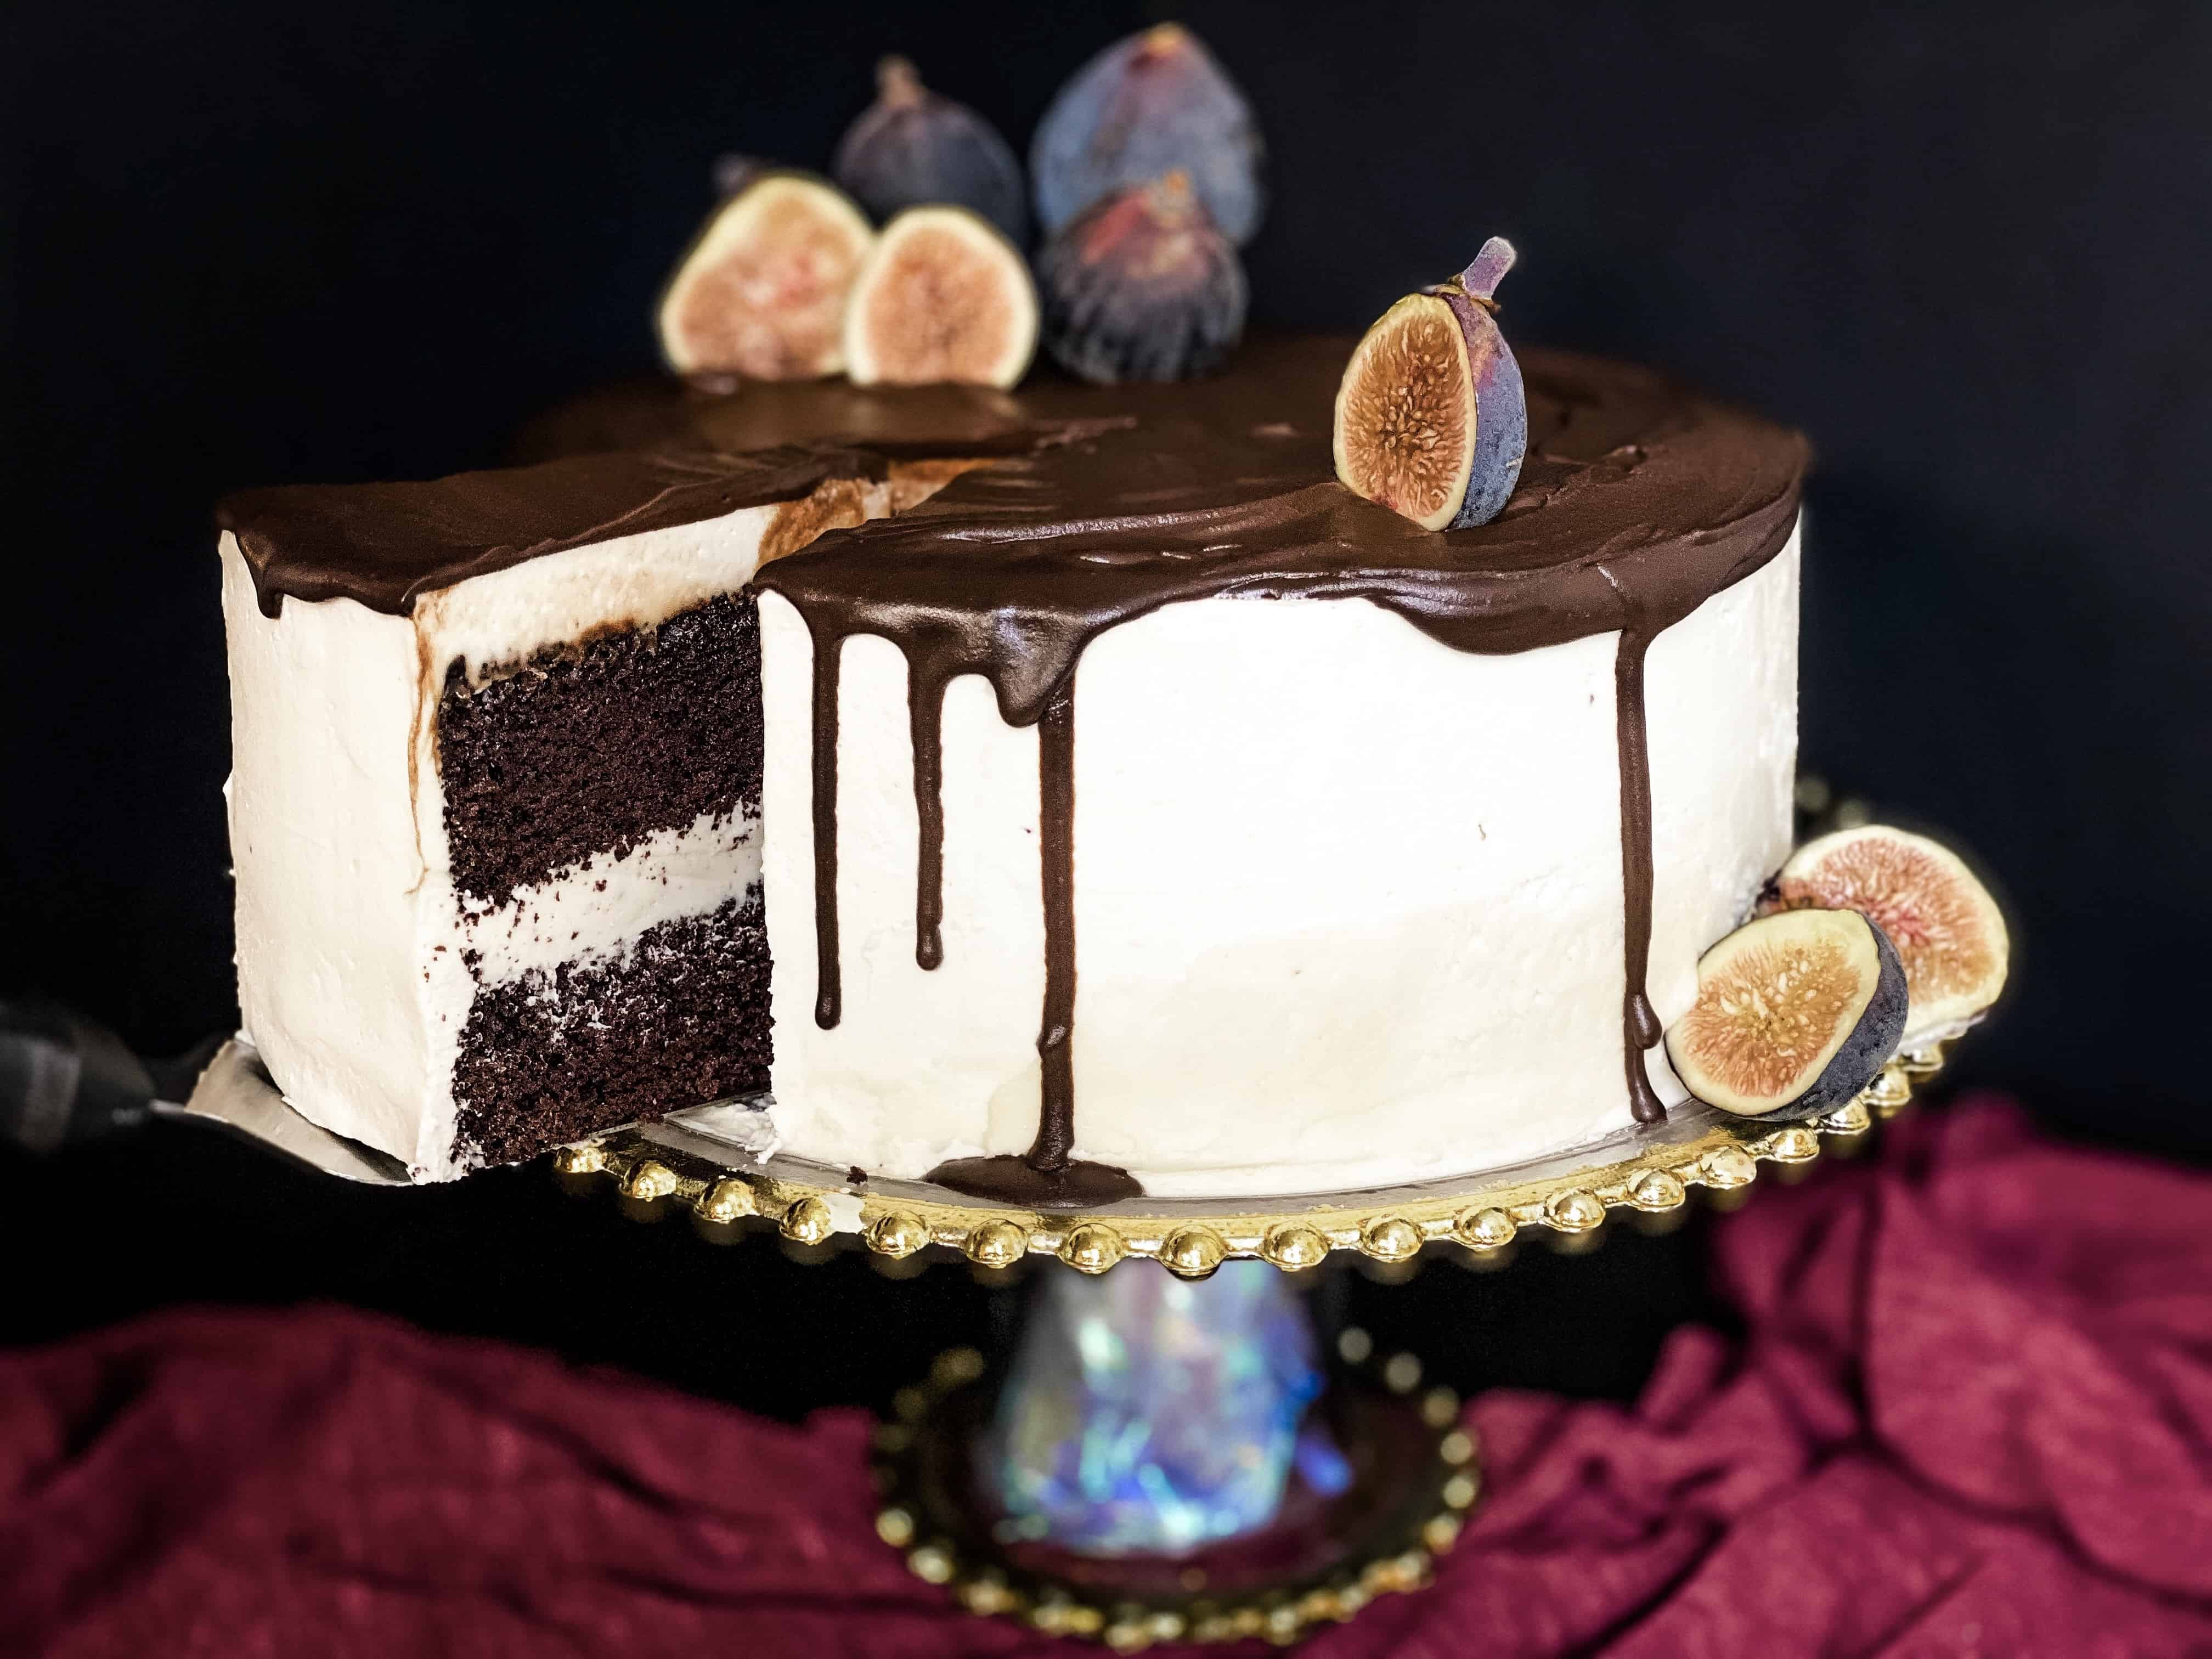
Fruit Smoothie Cake (vegan, oil-free)

July 6, 2019 //  by Meggan Leal//  10 Comments

I was on the hunt for a fruit-flavored cake recipe that was three things:

Stupidly simple –

Vegan –

Absolutely delicious –

I found a few recipes that hit two out of three, but none that checked all three off my list. So what did I do? I did what I do and I wrote one. But in order to write a cake recipe, you need to know a little cake science and do some dissecting.

So what parts are there to a traditional cake recipe? In no particular order: the flavor, the substance, the liquid, the leavening agent, the sweetener, the fat, and the binder.

I wanted my fruit flavored cakes to taste like.. well.. fruit. And what tastes more like fruit than fruit? So that definitely needed to be my first ingredient. And it just so happens that fruit purée not only makes an epic flavor base, but also an amazing egg replacer for binding AND oil substitute. And it’s juicy. Bam. Why haven’t I been doing this all along?!

The best strawberries in the world from a local farmer being smoothie-fied for cake

So the fruit does the job of four cake recipe components: flavor, liquid, binder, and fat [replacer].

Then you need your substance – the bulk of the cake. That’s your flour.

And you need leavening to give the cake rise – that’s when the batter creates millions of tiny bubbles within itself and the cake puffs up, becoming a sponge instead of a hockey puck. Traditional cakes do this in a variety of ways: usually eggs filling with steam and the addition of a bit of baking powder. This cake does it with a chemical reaction of acid + base. Think back to elementary school volcanoes made with vinegar and baking soda. That’s what we are doing here, but with citric acid instead of vinegar.

For sweetness I normally use Zulka unrefined granulated sugar, but any granulated sugar will work. It also works wonderfully with coconut sugar, and for a no-sugar-added cake granulated stevia works amazingly! Just keep in mind that fruits contain natural sugars, and most flours are high in carbs which can cause sugar spikes – so while this cake made with stevia will be more diabetic-friendly than most other cakes out there, it still isn’t something that can be eaten in excess without glycemic consequences.

So with the realization of how many jobs fruit purée can do and an understanding of what other components need to be addressed, this cake can be made with, at the bare minimum, four ingredients. FOUR! And it’s DELICIOUS made with only four ingredients!

So if you’re dealing with food allergies and need something base-line basic, I’ve got you! This can be made with just an acidic fruit purée, sugar, baking soda, and flour – omit everything else and follow the steps the same way. Do you need it to be gluten-free? Use your favorite cup for cup gluten-free flour and add a teaspoon of baking powder (results may vary based on the brand or mix of gluten-free flour you use, so please test yours).

Strawberry smoothie cupcakes and cakes, made with only four ingredients. Who would have thought?

So you may be asking – why in the world would you add more stuff to it if it’s delicious with just those four??

Good question.

With just those four ingredients, the cake is stupidly simple, vegan, and absolutely delicious. BUT – sometimes I make showstopper cakes that need to hold up well with lots of layers, can be carved, can be crumb coated and frosted with ease, and some people really like extra flavor on top of the natural fruit, as well as a pop of color – so I made a few additions to make those things happen.

Flax helps the cake to be more sturdy and less crumbly, salt balances the sweetness, and the kool-aid powder adds extra flavor, color, and citric acid to react with our baking soda for more lift. If you use it, choose the same flavor as your fruit purée or a complimentary flavor (peach-mango with mango purée, for instance). If you’re using a fruit that isn’t very acidic (blueberries, for instance) you need the extra boost of acidity – so if you don’t want to use KoolAid powder, use a tablespoon of vinegar or lemon juice instead).

Strawberry smoothie cake all trimmed and torted and ready for filling, surrounded by the chaos that results from cake decorating.

So far I’ve made this recipe with strawberry, mango, peach, kiwi, dragonfruit, pineapple, raspberry, and blueberry. If you want to try another flavor, or even combine them, go for it and let me know what you did!

Making fruit-flavored pastry is a peach-a-cake! ;D
Here are the fluffy innards of a peach smoothie cake.

And finally, keep in mind that this cake, because it is made of mostly fruit, will be more dense than your traditional light and fluffy birthday cake style cake. To avoid it being any more dense than necessary make sure to gently fold the wet and dry ingredients together rather than stirring (so you don’t develop the gluten and make the cake chewy and bready). You can also add extra flour, up to a cup, to lighten it up a bit. But remember that the more flour you add, the less the fruit flavor and color will come through.

This recipe is great for cakes, cupcakes, cake pops, and even pancakes! It can be doubled, tripled, halved, or quartered and still works great. Try it with my quick and easy ganache or my easiest buttercream ever.

Take a look at my video here to watch how I whip up the batter in less than ten minutes, and please subscribe to my YouTube channel to be the first to know about new tutorials I put up:

VIDEO:


Yield: 1 10” or 2 8” or 3 6” or 24 cupcakes

Vegan Fruit Smoothie Cake

Vegan Fruit Smoothie Cake

The simplest fruit-flavored cake recipe ever. Made with fruit as the first ingredient, it’s super allergy-friendly, infinitely customizable, oil-free, and can be made with no added sugar and gluten-free as well.

Prep Time 10 minutes
Cook Time 50 minutes
Total Time 1 hour

Ingredients

  • 2.5 cups fruit purée (540g)
  • 2 cups sugar (400g)
  • 2 tablespoons ground flax seed
  • 5 tablespoons hot water
  • ———
  • 3.5 cups flour (440g)
  • 2 teaspoons baking SODA (bicarb)
  • 1 packet of KoolAid or other acid-based unsweetened drink powder
  • 1/2 teaspoon salt

Instructions

  1. Preheat your oven to 325°F (160°C) and prepare your cake pans (I like to use nonstick spray and a parchment paper circle inside the bottom).
  2. Prepare your flax eggs by mixing the ground flax and hot water in a small bowl or cup (1 tbsp of flax + 2.5 tbsp water = one flax egg - so you’re making two eggs here. Also, using hot water speeds up the process). Set aside.
  3. Add your flour, baking soda, salt, and KoolAid powder to a medium mixing bowl. Sift or whisk if you’d like.
  4. Add your fruit purée and sugar to a large mixing bowl.
  5. Add your flax egg to the fruit/sugar once it’s goopy - after about ten minutes.
  6. Pour your dry ingredients into the wet, and fold them together using a silicone spatula until the batter doesn’t have any dry bits. Don’t stir! Fold!
  7. Pour the batter into your prepared pans.
  8. Bake for 45-50 minutes, or until a toothpick inserted comes out clean. (Cupcakes take about 17 minutes)
  9. Proceed as usual and enjoy your cake!

Recommended Products

As an Amazon Associate and member of other affiliate programs, I earn from qualifying purchases.

  • 48 Kool Aid packets of Peach Mango Makes 96 quarts just add sugar
    48 Kool Aid packets of Peach Mango Makes 96 quarts just add sugar

Nutrition Information:

Yield:

24

Serving Size:

1

Amount Per Serving: Calories: 148Total Fat: 1gSaturated Fat: 0gTrans Fat: 0gUnsaturated Fat: 1gCholesterol: 8mgSodium: 153mgCarbohydrates: 33gFiber: 1gSugar: 18gProtein: 2g

This nutrition information has been calculated based on the recipe as written and with strawberry purée. These values will change if you alter the recipe.

© Meggan Leal
Category: Desserts and Pastries

Allergy-Friendly and Vegan Pastry Recipes:

Vegan Gingerbread Cookies – Chai Espresso

Vegan gingerbread cookies with a little something extra – chai and espresso! Spicy, no-chill,…

Vegan Gingerbread Cookies – Chai EspressoRead More

Vegan Brownies from Box Mix

Vegan brownies from box mix is easy. I’ll show you how to do it,…

Vegan Brownies from Box MixRead More

Cover photo for Mottled Macaron Troubleshooting

Macaron Troubleshooting: Mottled Macarons and 10 Ways to Prevent Them

Why are my macarons mottled and stained on top? Learn what causes it and…

Macaron Troubleshooting: Mottled Macarons and 10 Ways to Prevent ThemRead More

Cover photo for Burning Bottoms post

Macaron Troubleshooting: Burning Bottoms

Why are my macarons burning on the bottom? Learn why the bottoms burn, and…

Macaron Troubleshooting: Burning BottomsRead More

melty vegan cheese sauce on a pizza

Easy Vegan Cheese for Pizza (Nut-Free, No Blender)

Vegan cheese for pizza that actually tastes good, is quick and easy to make…

Easy Vegan Cheese for Pizza (Nut-Free, No Blender)Read More

Vegan Cheesecake Dip (dairy-free, nut-free, coconut-free, cream-cheese-free)

Two inexpensive and easy-to-find grocery items combine to perform magic in this simple but…

Vegan Cheesecake Dip (dairy-free, nut-free, coconut-free, cream-cheese-free)Read More

Koala Macaron Template cover photo

Koala Macaron Template & Tutorial

To support ongoing bushfire relief efforts in Australia Printable pdf macaron template and tutorial…

Koala Macaron Template & TutorialRead More

Silk Vegan Heavy Whipping Cream Review

Wondering if the new dairy-free, vegan heavy whipping cream alternative from Silk is perfect?…

Silk Vegan Heavy Whipping Cream ReviewRead More

Vegan meringues

Easiest Vegan Meringue Cookies Ever with Aquafaba

Vegan meringue cookies are super easy to make, with ingredients you probably have right…

Easiest Vegan Meringue Cookies Ever with AquafabaRead More

Category: Desserts and PastriesTag: cake, Dairy-Free, easy, Egg-Free, Gluten-Free, Nut-free, Oil-Free, Peanut-Free, Soy-Free, Sugar-Free, Vegan

Chocolate Wacky/Crazy Cake (one-bowl, vegan)

December 20, 2018 //  by Meggan Leal//  45 Comments

My grandma’s recipe from the depression era, called “whacky”, “wacky”, or “crazy” cake because it’s made with no dairy or eggs (they were not affordable) and still turns out marvelously. It’s an intense chocolate cake that is naturally vegan, super easy to make, and will be your new go-to recipe for decadent desserts!


This recipe was proudly featured in the January/February 2020 issue of Sierra Magazine!

Sierra Magazine logo

So many people ask me for my chocolate cake recipe, saying that it’s the best chocolate cake they’ve ever tasted – so here you go! It’s adapted from a recipe my grandmother used during the depression (or so I was told) when eggs and milk were scarce. It’s rich and indulgent and no one is ever the wiser that it’s vegan and oh-so-simple to make with oh-so-simple ingredients.

It’s amazing for making show-stopping layer cakes, carved cakes, cake pops or cupcakes.

Once you’ve made your batter, pour it into oiled and parchment-paper-lined pans and bake at 325F (162C) for 35-45 minutes, or until a toothpick inserted comes out clean. I usually check at 40 minutes by giving the pan a jiggle, and if the batter jiggles as well I check in another ten minutes. If it doesn’t jiggle, I test with a cake tester/toothpick. If that comes out with wet batter, I give it another five minutes before checking again.

Makes a quarter sheet (9×13), or two 8” round cakes, or three 6” round cakes, or 24-30 cupcakes.

Cover it in my easiest vegan buttercream ever or the less sweet American meringue version– or go super chocolatey with my quick and easy vegan ganache! 

Once it’s baked, the cake can be stored in the freezer – either frosted or naked – double wrapped in plastic wrap, for up to a month. Triple wrap and put it in a box to leave it in the freezer for up to six months. Otherwise it can be kept covered at room temp for up to a week.

Watch Me Make It!

Pin it for later!

Pinterest Image

Printable Recipe Card:

Yield: 1 10", 2 8", 3 6" cakes, or 24 cupcakes

One-Bowl Chocolate Whacky Cake (vegan, soy-free, nut-free)

One-Bowl Chocolate Whacky Cake (vegan, soy-free, nut-free)

The ultimate chocolate cake. It's rich, moist, delicious with a tender crumb, and perfect for carving and stacking. My grandma gave me this recipe, and said it's what they used during the depression when milk and eggs were not affordable. It's super allergy-friendly and many people say this is the best chocolate cake they've ever had.

Prep Time 5 minutes
Cook Time 45 minutes
Total Time 50 minutes

Ingredients

  • 3.5 cups all purpose flour (420g)
  • 2 cups sugar (400g)
  • 2 tsp baking soda (bicarb) (12g)
  • 1/2 cup cocoa powder (dark cocoa is my favorite) (50g)
  • 1 tsp salt (6g)
  • 2 tbsp vinegar (30ml)
  • 2 tsp vanilla extract (10ml)
  • 3/4 cup of melted vegan butter/margarine (you can use oil, see notes below) (175ml)
  • 2 cups hot coffee (475ml)

Instructions

  1. Preheat your oven to 325F (162C)
  2. Prepare your cake pans with nonstick spray and parchment paper circles on the bottom
  3. Whisk together your flour, sugar, baking soda, cocoa powder, and salt in a large mixing bowl
  4. Create three deep wells in your dry mix
  5. To the first well, add your vinegar. To the second, add the vanilla. To the third, add the melted butter/oil
  6. Pour your hot coffee over the entire mixture
  7. Gently whisk or fold your batter until it's well combined and no dry bits remain
  8. Divide your batter evenly among your prepared pans
  9. Bake for 45 minutes or until you insert a toothpick into the center of the cake and it comes out clean
  10. Remove your cakes from the oven to a cooling rack. Let it sit in the cake pan for five minutes before turning it out.

Notes

*This can be made with your favourite cup-for-cup gluten-free flour if you want to make a wheat-free version.

*For a no-sugar-added version, use a cup-for-cup Stevia baking blend in place of the granulated sugar.

*Using melted butter is recommended for stacked or carved cakes. Oil is best for cupcakes as it results in a fluffier cake.

*Use your favorite plant milk instead of coffee for a delicious milk-chocolate cake

*For soy-free, use melted Country Crock Plant Butter sticks (avoiding the almond one if you have a nut allergy) or Miyoko’s butter if you’d like to also avoid palm-oil. Or use a non-soy oil instead.

© Meggan Leal
Cuisine: American / Category: Desserts and Pastries

Allergy-Friendly and Vegan Pastry Recipes:

Vegan Gingerbread Cookies – Chai Espresso

Vegan gingerbread cookies with a little something extra – chai and espresso! Spicy, no-chill,…

Vegan Gingerbread Cookies – Chai EspressoRead More

Vegan Brownies from Box Mix

Vegan brownies from box mix is easy. I’ll show you how to do it,…

Vegan Brownies from Box MixRead More

Cover photo for Mottled Macaron Troubleshooting

Macaron Troubleshooting: Mottled Macarons and 10 Ways to Prevent Them

Why are my macarons mottled and stained on top? Learn what causes it and…

Macaron Troubleshooting: Mottled Macarons and 10 Ways to Prevent ThemRead More

Cover photo for Burning Bottoms post

Macaron Troubleshooting: Burning Bottoms

Why are my macarons burning on the bottom? Learn why the bottoms burn, and…

Macaron Troubleshooting: Burning BottomsRead More

melty vegan cheese sauce on a pizza

Easy Vegan Cheese for Pizza (Nut-Free, No Blender)

Vegan cheese for pizza that actually tastes good, is quick and easy to make…

Easy Vegan Cheese for Pizza (Nut-Free, No Blender)Read More

Vegan Cheesecake Dip (dairy-free, nut-free, coconut-free, cream-cheese-free)

Two inexpensive and easy-to-find grocery items combine to perform magic in this simple but…

Vegan Cheesecake Dip (dairy-free, nut-free, coconut-free, cream-cheese-free)Read More

Koala Macaron Template cover photo

Koala Macaron Template & Tutorial

To support ongoing bushfire relief efforts in Australia Printable pdf macaron template and tutorial…

Koala Macaron Template & TutorialRead More

Silk Vegan Heavy Whipping Cream Review

Wondering if the new dairy-free, vegan heavy whipping cream alternative from Silk is perfect?…

Silk Vegan Heavy Whipping Cream ReviewRead More

Vegan meringues

Easiest Vegan Meringue Cookies Ever with Aquafaba

Vegan meringue cookies are super easy to make, with ingredients you probably have right…

Easiest Vegan Meringue Cookies Ever with AquafabaRead More

Category: Cakes, Desserts and PastriesTag: cake, chocolate, Dessert, Vegan

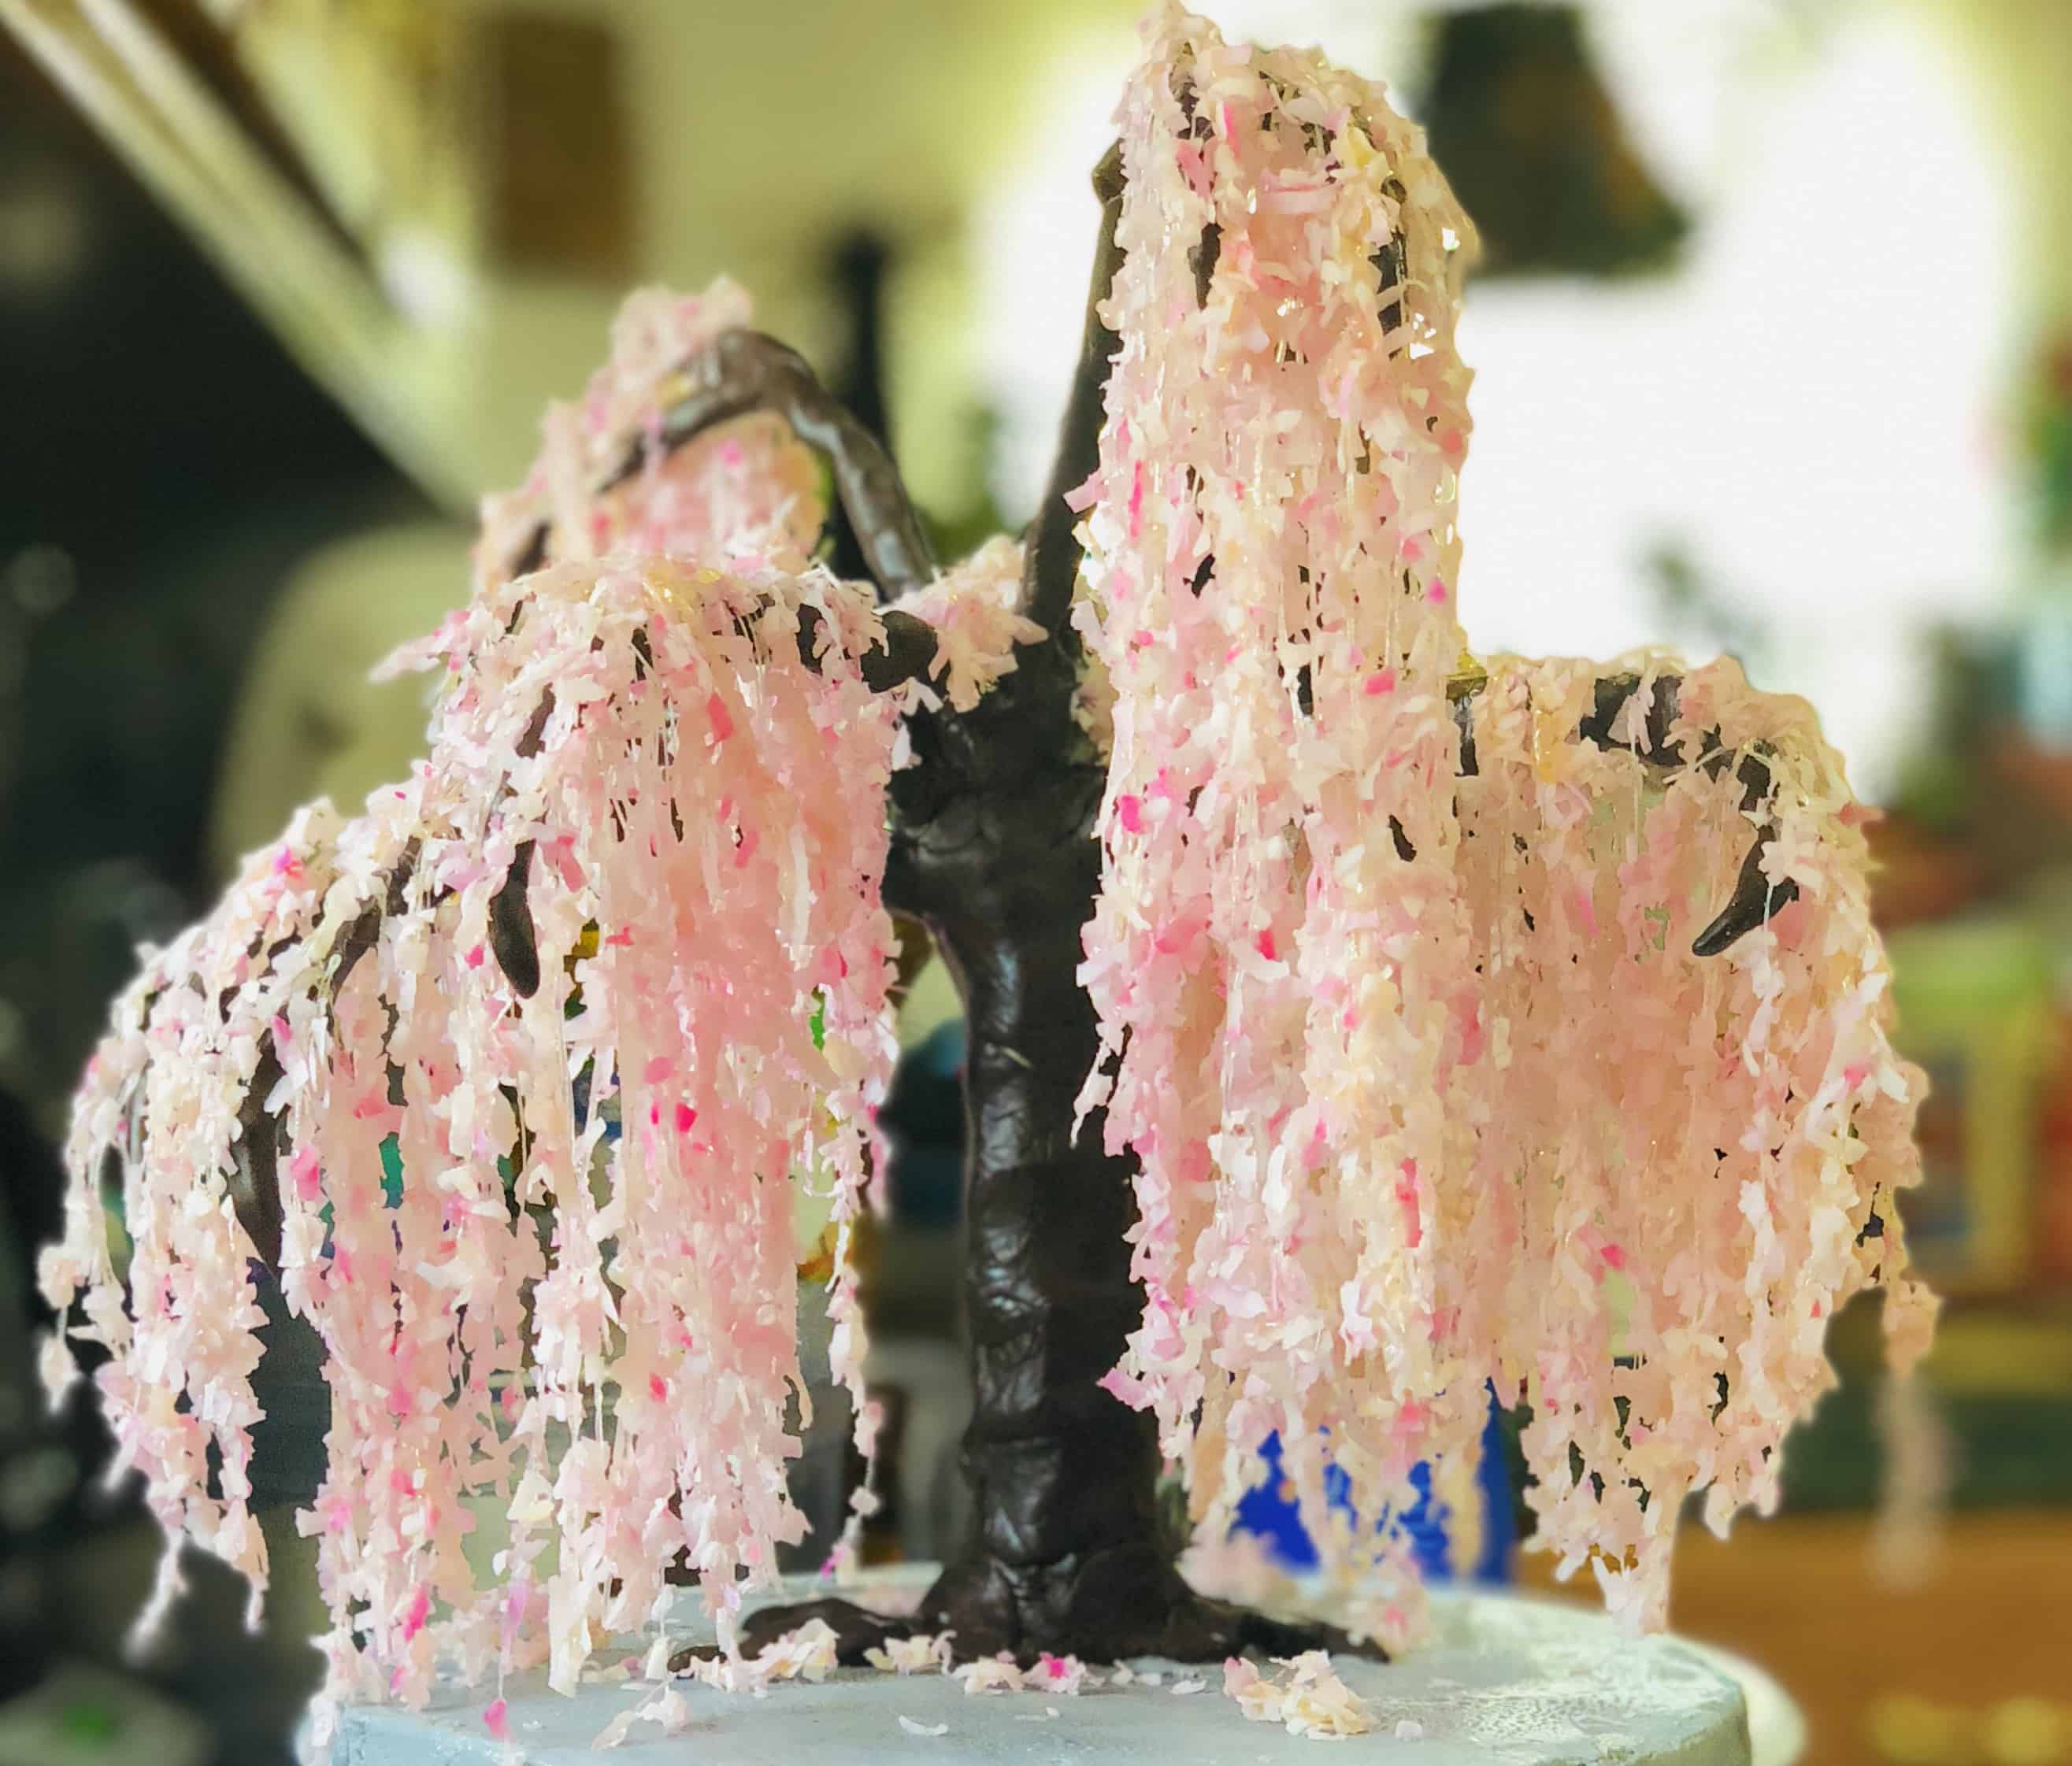
Weeping Willow Cake Topper Tutorial

May 2, 2018 //  by Meggan Leal//  Leave a Comment

This weeping willow cake topper is one of my favourite projects to date. It took ages and it was labor intensive, but it was totally worth it in the end.

I’ll add more bits of the tutorial as I get them ready, but here is how I did the hanging branches:

What you will need:

prepared tree trunk and main branches (I used modeling chocolate around a dowel, a boba straw, and cake wires)

Isomalt, melted according to package instructions  (I use CK Products Isomalt Crystals)

shredded coconut, colored if desired

kitchen string

a rimmed cookie sheet with a silicone mat laid on it

tweezers

PLEASE NOTE: melted isomalt is EXTREMELY hot and can burn you! Please use caution when working with it. Gloves, glasses, long pants and sleeves, as well as closed-toes shoes are recommended.

Video Tutorial:

Category: Desserts and PastriesTag: cake, chocolate, coconut, Gluten-Free, isomalt, modeling chocolate, tutorial, Vegan

Site Footer

Featured in:


Sierra Magazine logo

Bake Like a Vegan Pro logo
As an Amazon Associate, I earn from qualifying purchases.

Copyright © 2021 · All Rights Reserved ·

This site uses cookies: Find out more.