
Vegan cookies and cream cake tastes just like your favorite chocolate sandwich cookies, but in cake form. Easy to make, easier to eat!
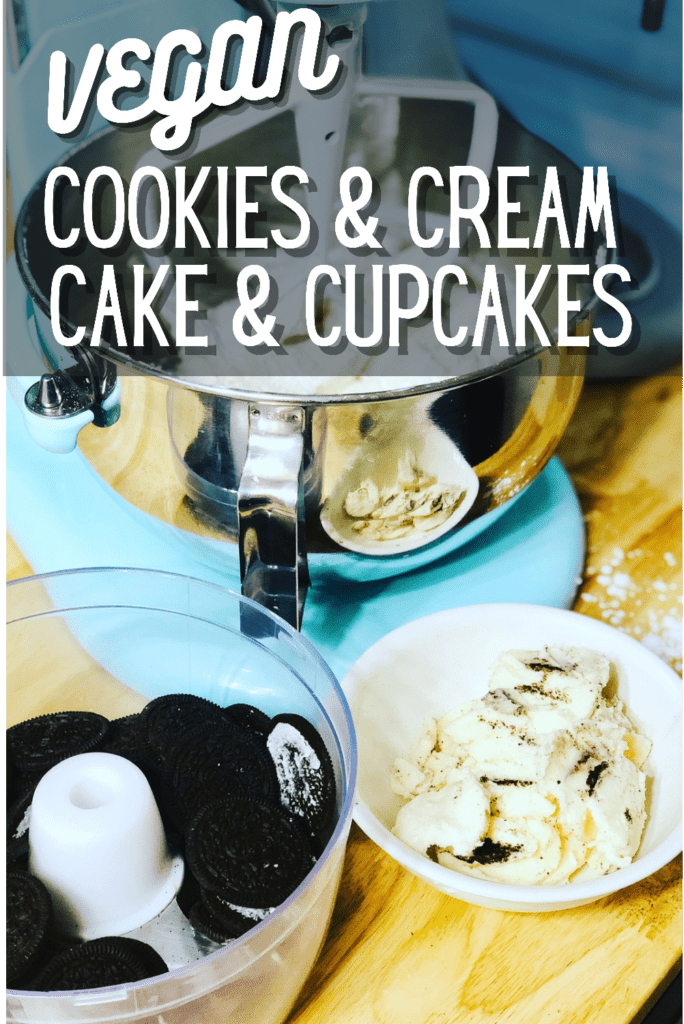
Cookies and cream (or creme) was one of the most popular cake and cupcake flavors in my vegan bakery. Rather than simply add ground up cookies to the cake and the buttercream, I took a different approach to give the cake distinct cookie layers.

My cake layers go thusly, from the top to the bottom:
- Cookies
- Cookies and cream buttercream
- Chocolate cake
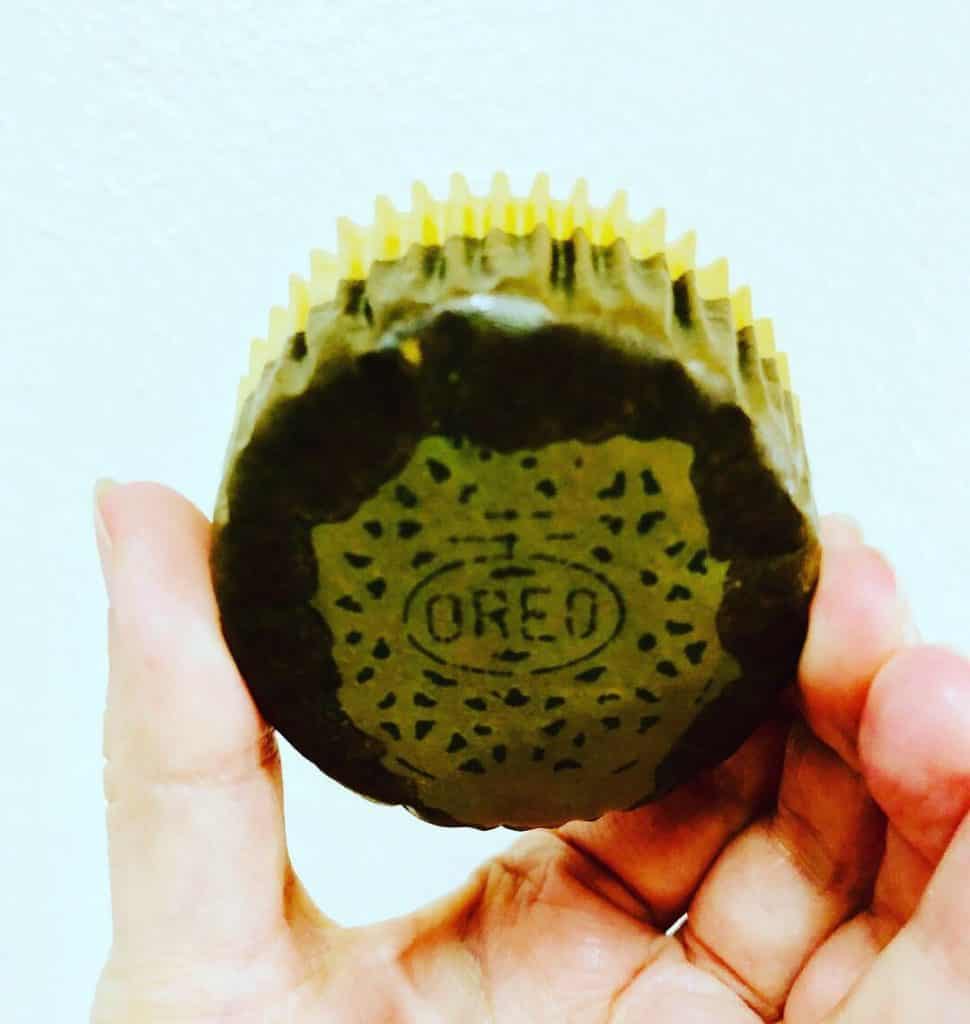
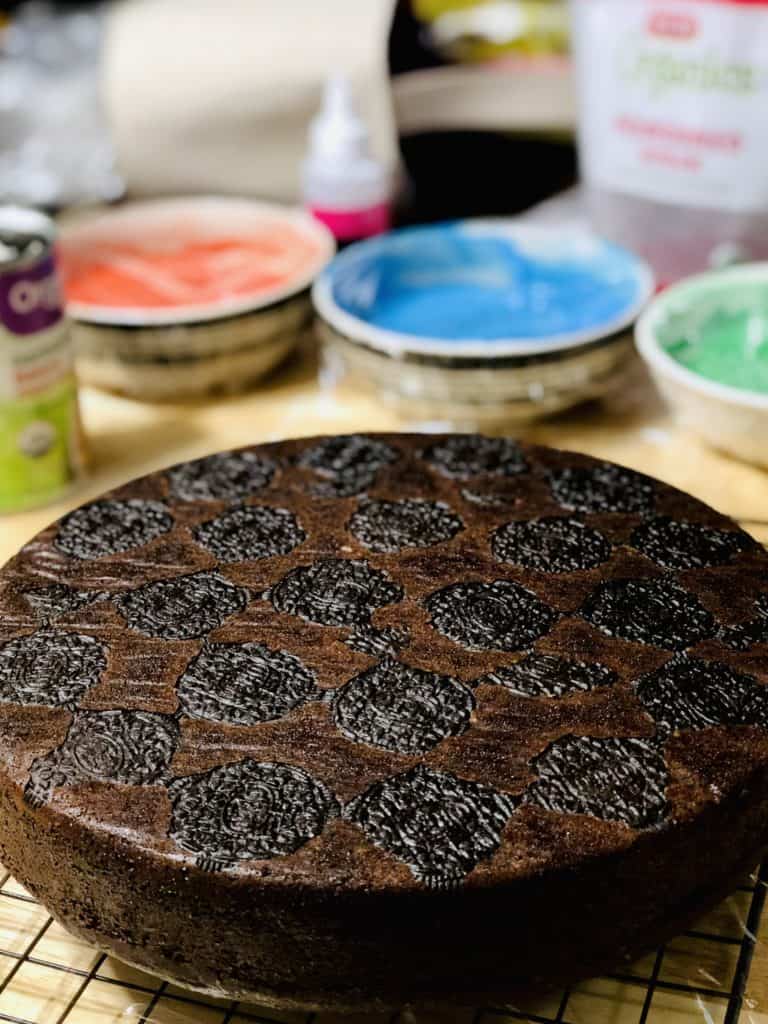
- Cookies
- Cookies and cream buttercream
- Cookie pieces
- Cookies and cream buttercream
- Chocolate cake
- Cookies
And for the cupcakes:
- Cookie
- Cookies and cream buttercream
- Chocolate cake
- Cookie
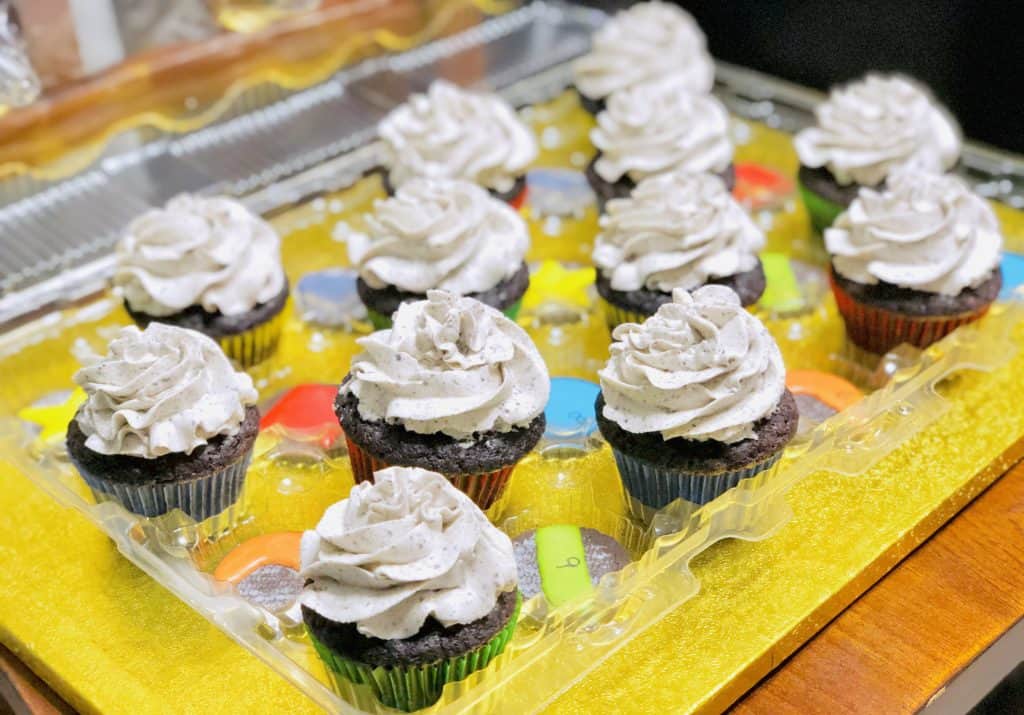
As you can see, that’s a lot of cookies and cream in this cake!
What kind of cookies should I use? What about gluten-free?
I used Oreos (yes, Oreos are egg and dairy free!) because that’s what I had readily available to me and was usually requested by my clients. You could also use the store brand, but always double check the ingredients to make sure they’re free from animal products!
You can use the double-stuffed ones, but I prefer not to or they could mess with the cookie layer’s texture a little once it’s baked.
If you’re making a gluten-free version of this cake, Oreo now makes gluten free cookies, or grab some of the cookies by Glutino.
If you are concerned about cross contamination of dairy, then I recommend the c
I will be publishing my recipe soon for chocolate sugar cookies, which are pretty amazing in this application! So stay tuned for that. 🙂
What sort of butter should I use for the vegan cookies and cream buttercream?
I am in love with Country Crock plant butter sticks. It’s all I use, now. I’m aware they aren’t available everywhere though, so I wrote a very lengthy post on vegan butters for vegan buttercream which you can find here. I go into detail on how you can achieve success and deliciousness no matter what vegan butter you choose to use!
Can I use something instead of coffee? I’m worried about the caffeine.
Absolutely! If you check out my other post on chocolate whacky cake (the base for this cake recipe), I explain what other choices there are for liquids to use instead of the coffee. Keep in mind that they may change the flavor, though.
If you’re avoiding caffeine, you could also just use decaf – if you can tolerate it.
Remember that the chocolate also contains caffeine, though. If you’re truly intolerant you may want to find a different flavor of cake to use.
What is this about freezing the cake before frosting it?
A little secret I learned while I had my bakery was about freezing cakes.
While most people not in the know would freak out at the idea of a cake being frozen, it actually makes the cake better.
I double wrap my cakes in cling film as soon as I can touch them without injuring myself after they come out of the oven. I pop them in the freezer for at least 24 hours. What happens, on the science level, is that all the water in the cake that would have escaped as steam, gets trapped inside instead.
That water vapor that freezes inside the cake forms ice crystals that pierce and shred some of the gluten strands in it. What ends up happening is you get a much more moist cake with a more delicate texture than if you had let the cakes cool at room temp.
So yes, I freeze all my cakes. And they’re better for it!
It is also much easier to work with a frozen cake than a room temperature one. I trim and stack all my cakes while they’re still frozen for that reason. It’s really nice when your cake layers don’t fall apart on you while you’re trying to put them together.
THIS ISNT RECOMMENDED FOR GLUTEN FREE VERSIONS THOUGH!!
How do I store my vegan cookies and cream cake?
You can store your iced cake covered at room temperature for about a week or in the fridge for two weeks.
If you want to freeze it, I suggest popping it in the freezer for twenty minutes, then double wrapping it in cling film and putting it into a box and back in the freezer. It should stay fresh up to six months this way!
Is this cake healthy?
Errrmm… No. No I would not say that it is. Can you make it healthy? Not with this recipe you can’t! It would take way too many substitutions and be a totally different recipe altogether.

Thanks for stopping by!
I popped the very detailed instructions into the recipe card below rather than up here because it seems everyone skips my articles. Lol.
If I wasn’t detailed enough and you need more info, feel free to leave a comment or message me on Facebook @cookingoncaffeine! I’m happy to help. 🙂
May you and your coffee both be strong,
Meggan
Recipe:
Vegan Cookies and Cream Cake
Vegan cookies and cream cake tastes just like your favorite chocolate sandwich cookies, but in cake form. Easy to make, easier to eat!
Ingredients
For Both the Cake and the Frosting
- 2 14.3oz (405g) packages of chocolate sandwich cookies (like Oreos)
For the Cake
- 3.5 cups all purpose flour (420g)
- 2 cups sugar (400g)
- 2 tsp baking soda (bicarb) (12g)
- 1/2 cup dark or black cocoa powder (50g)
- 1 tsp salt
- 2 tbsp vinegar (30ml)
- 2 tsp vanilla extract
- 3/4 cup of neutral oil such as canola or avocado (175ml)
- 2 cups hot coffee, strong (475ml)
For the Frosting
- 2 cups room temp high-fat vegan butter* (four sticks) (460g)
- 8 cups powdered sugar (900g)
- 4 Tbsps vanilla coffee creamer (60ml)
- 2 tsp vanilla extract
Instructions
Preparing the Cake Pans
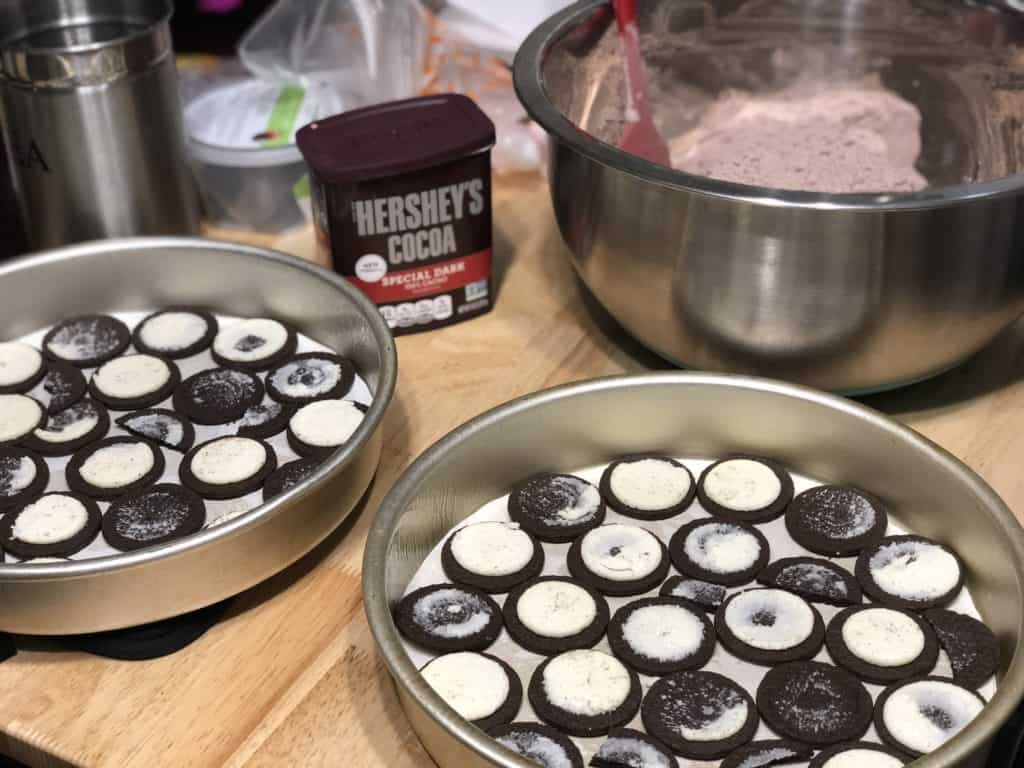
- Line your cake pans with parchment paper (or liners if making cupcakes).
- Twist open enough of the sandwich cookies to cover the bottom of the cake pan with a single layer of cookies. Break some into smaller pieces to fill the gaps as best you can. For cupcakes, one cookie fills the bottom perfectly.
- After lining the bottoms of your pans with both parchment and cookies, it's time to prepare the cake batter.
Preparing the Cake Batter
- Preheat the oven to 325F (162C).
- Whisk together all of your dry ingredients and sugar - flour, sugar, baking soda, cocoa powder, and salt.
- Pour the wet ingredients into the dry - oil, coffee, vinegar, and vanilla.
- Carefully mix the wet and dry ingredients together until almost no dry bits remain. DO NOT OVERMIX - IT WILL CREATE A DENSE AND BREADY CAKE
- Use a ladle or large measuring cup to evenly distribute the batter between all of your cake pans. If making cupcakes, I like to use a large ice cream scoop!
Bake the Cakes
- Put the cake pans into your preheated oven.
- Cupcakes should take around 19-22 minutes and the cakes will take around 45 minutes, depending on your oven.
- Give the pan a wiggle, and if the batter jiggles in the middle leave them in for another 5 minutes. Once the batter doesn't jiggle anymore, stick a toothpick or cake tester straight down into the middle of the cake or a middle cupcake. Once it comes out clean, take the cakes out and put the pans on a cooking rack.
- After ten minutes, turn the cakes out onto the cooling rack to continue cooling.
- I like to double wrap my cakes in cling wrap as soon as I can touch them without burning myself, and freeze them for at least 24 hours before assembling them. You don't have to do this, but the cling wrap/freeze prevents the moisture from escaping as steam and gives them a nicer texture.
Make the Frosting (double for a 10" double-layer cake)
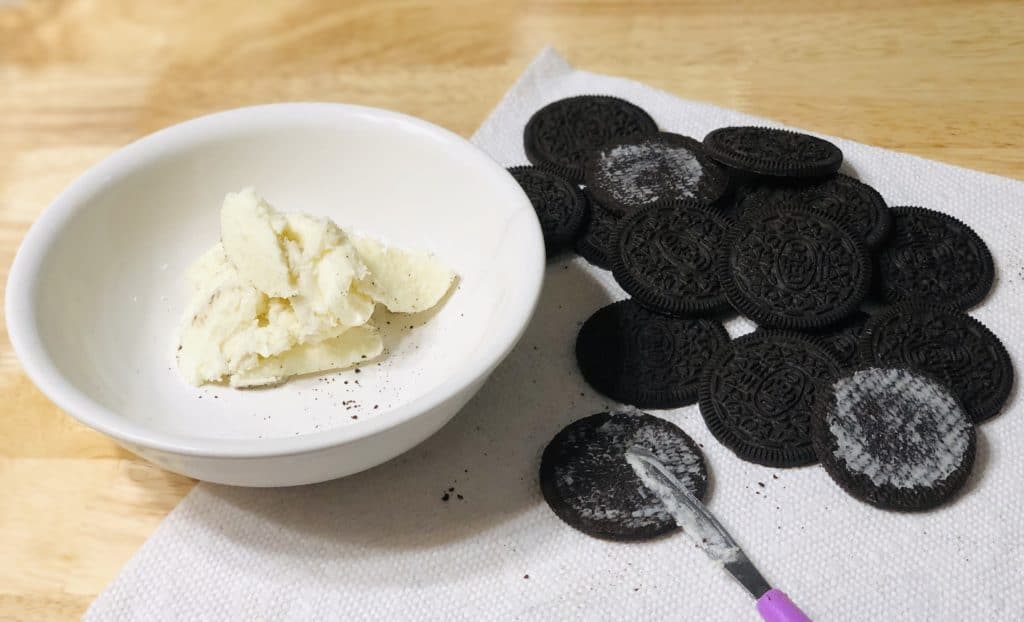
- Separate the remaining sandwich cookies left in the pack, and scrape the cream into the bowl of a stand mixer and put half of the naked cookies into a food processor.
- Blitz the cookies until they're very fine like sand.
- Add the butter and half the powdered sugar to the cream in the stand mixer equipped with the paddle attachment.
- Mix on low/stir until completely incorporated. It’s important to do this slowly to avoid gritty buttercream!
- Add the second half of the powdered sugar, and mix again on low/stir until completely incorporated.
- Slowly add your vanilla coffee creamer and vanilla extract while the mixer is still running.
- Once everything is completely incorporated, add in the cookie crumbs and mix on low.
- Stop the mixer and use a rubber spatula to scrape the sides and bottom of the bowl.
- Mix on low to fully incorporate everything.
- Mix in more coffee creamer to thin it and more powdered sugar to stiffen, as needed.
Assembling the Cake
- Trim the tops of your cakes to level them before assembling. Make sure they are totally cool before attempting to add frosting.
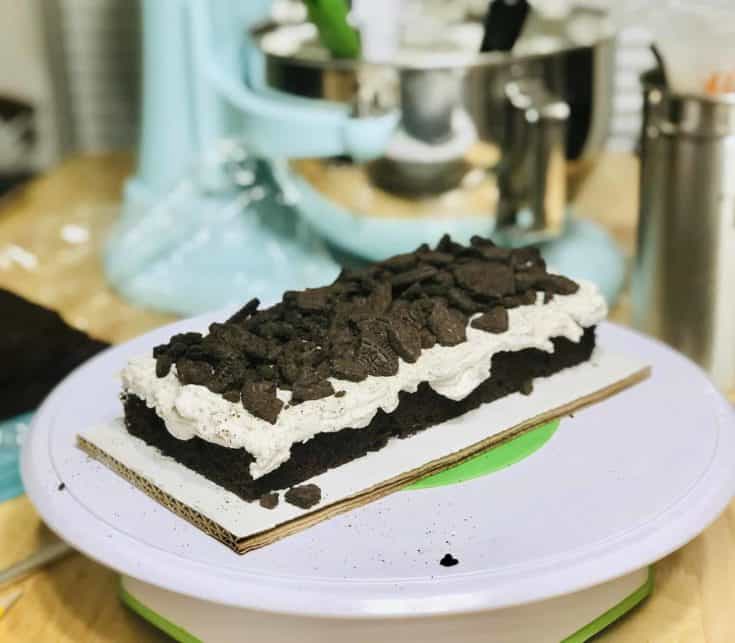
- Lay your first cake down and top it with a 1/2 layer of buttercream.
- Using your hands, crumble the remaining naked sandwich cookies from the pack over the layer of buttercream.
- Gently press the cookie pieces down into the buttercream and top with a thin layer of more frosting.
- Place the next cake on top of the buttercream/cookie layer.
- Repeat steps 2-4 if you're going to have a third cake layer.
- Use the remaining buttercream to frost the cake (no need to crumb coat since our frosting already has crumbs in it), and use a Wilton 1M or 2D tip to create rosettes or swirls on top.
- Use sandwich cookies from the second pack to adorn the swirls on the finished cake. You can also press some whole cookies or cookie crumbs along the bottom edge of the cake if you'd like.
Assembling Cupcakes
- Once your cupcakes have cooled, use a Wilton 1M or 2D tip to frost them. Start in the middle and spiral your way out for rosettes, or start on the outside and spiral your way up and in for the classic cupcake swirl.
- Place a sandwich cookie or sprinkle cookie crumbles on top of the swirl to decorate.
Notes
If you want more in depth explanations and videos on how to make my buttercream or the cake, check out the posts for the simple versions. You can find them here: for the buttercream and for the cake.
I highly recommend reading through the buttercream post if you're new to vegan buttercreams in general, as it will help you achieve a silky smooth, perfect frosting!
I also like to personalize the sandwich cookies by decorating them with my vegan royal icing.
Lots of folks enjoy adding ganache to this cake, but I find that it has enough chocolate already. If you're a chocoholic though, then go for it. 🙂
*If you're going to be carving or stacking these cakes very high, I recommend using melted vegan butter instead of oil for stability.